Candy store or hardware store?
When when visiting the local christmas market to gather some inspiration and inhale season emotions, next to the usual booths we found one which sold all kind of stuff you'd usually expect in a hardware store: nuts & screws, 9V batteries, wrenches, and similar items but all made out of chocolate. Dark brown chocolate, looking like old, rusted iron - we knew we had found our next project.
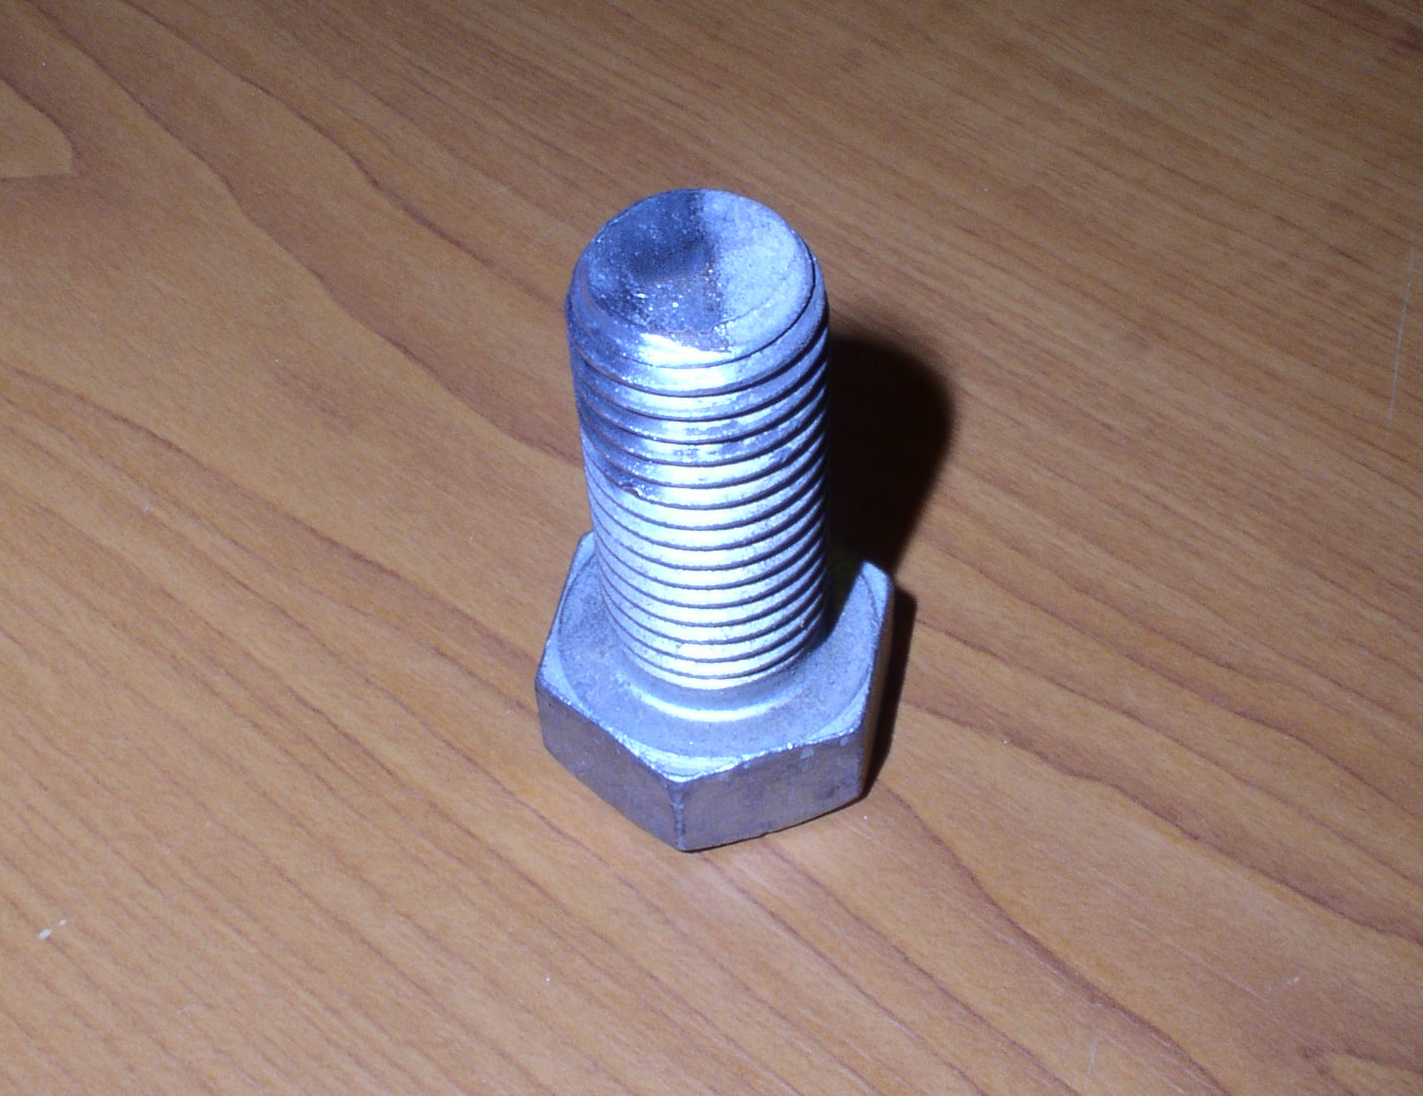
Our victim: a M20 screw (metric size). This will be replicated in chocolate, alongside with a fitting nut and a 9V block battery.
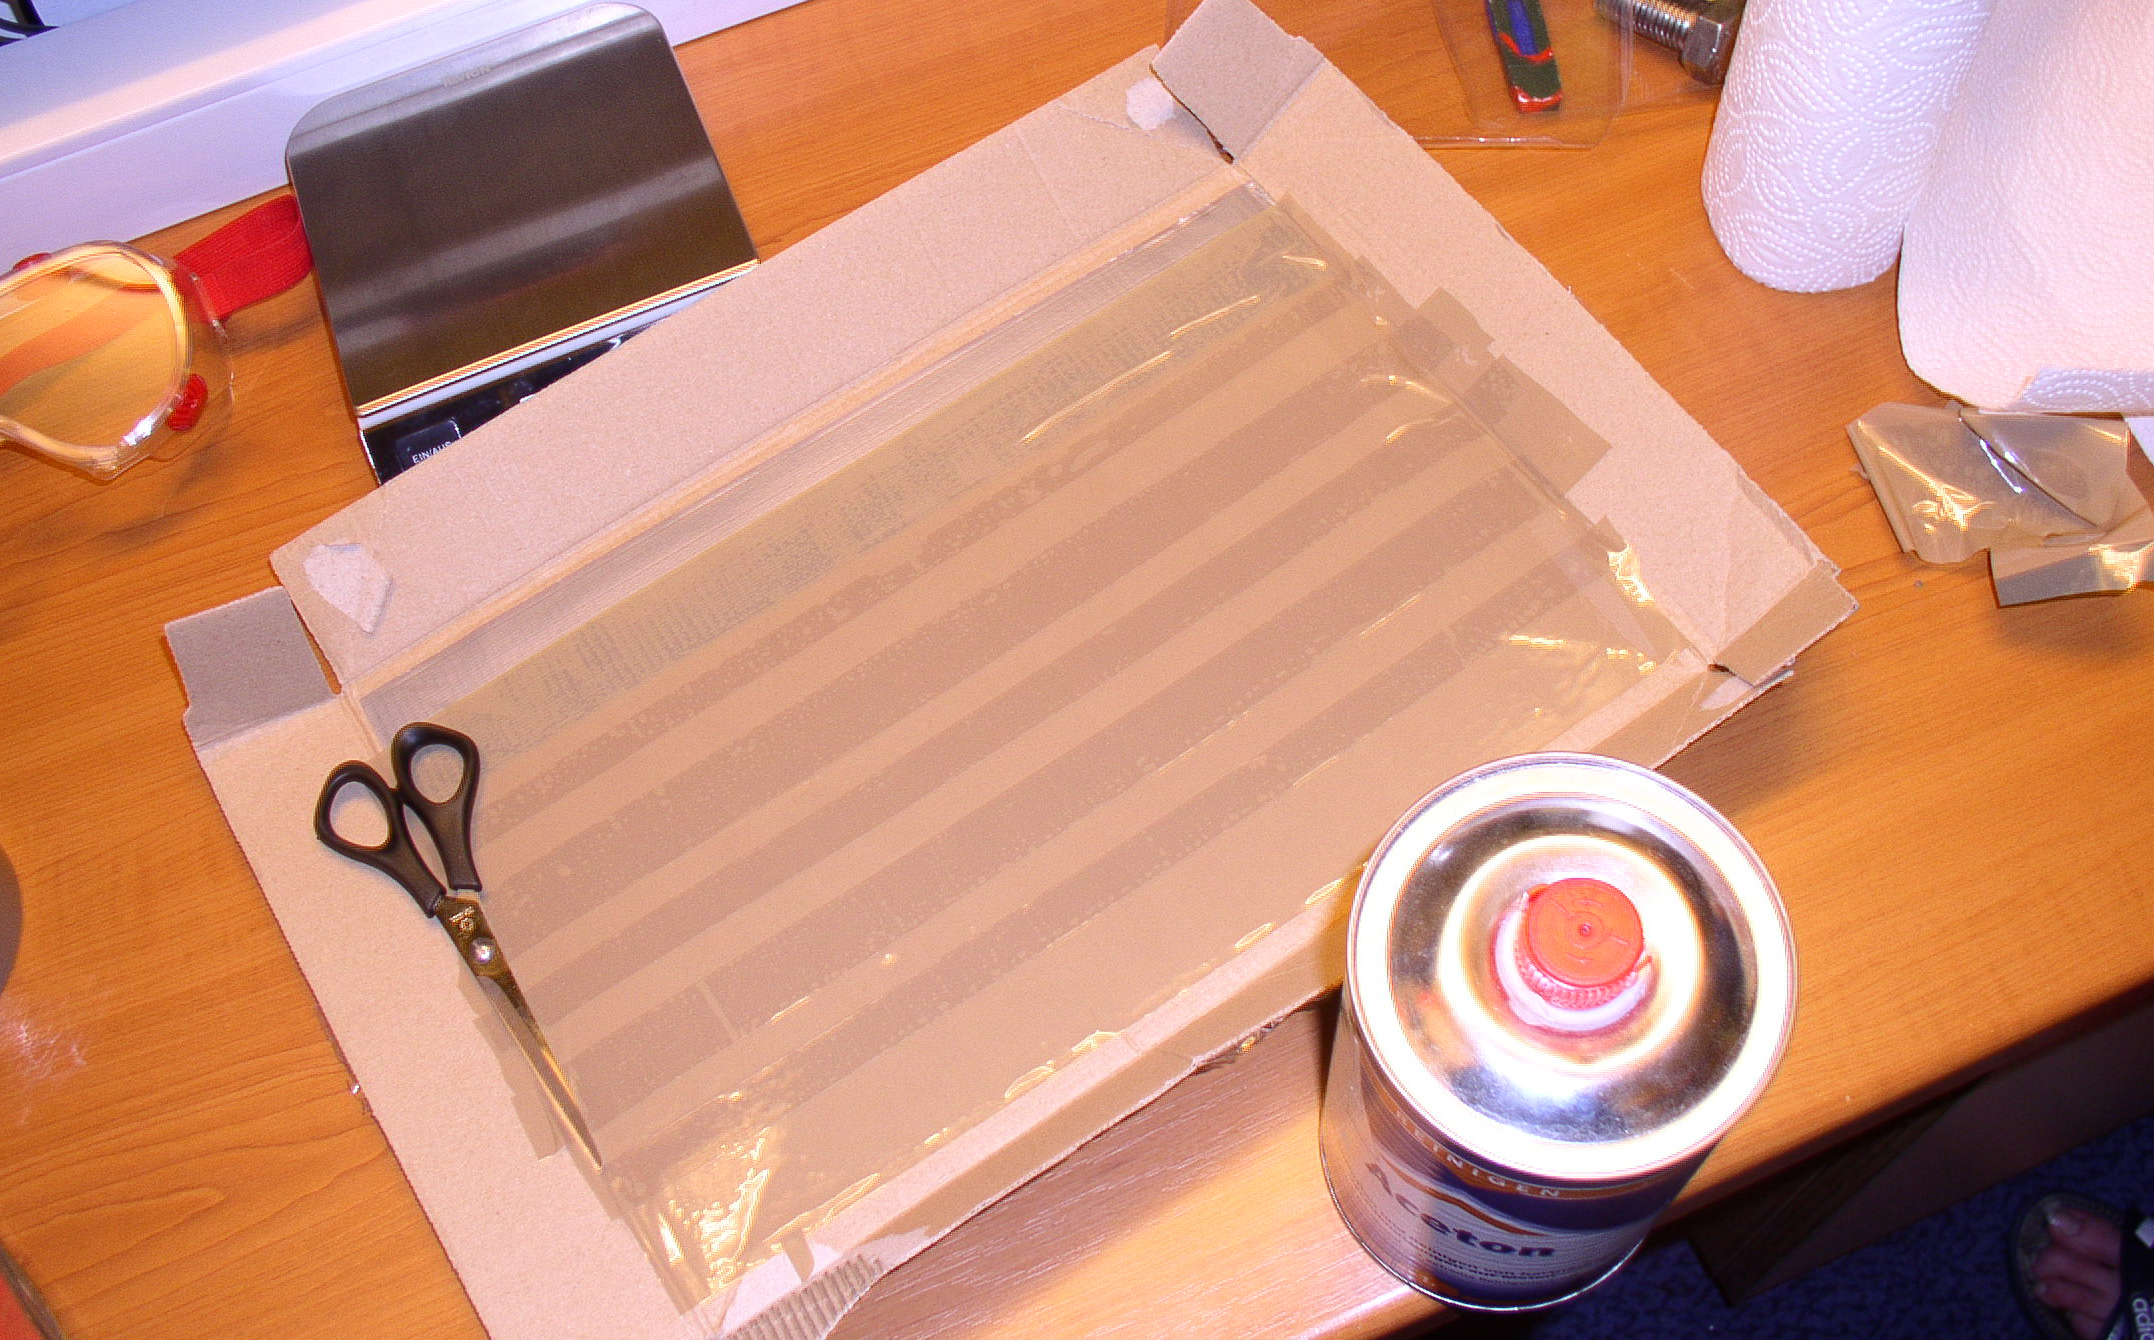
Preparing an encasement: cardboard + tape. Cheap, flexible, won't stick to anything and can be discarded afterwards.
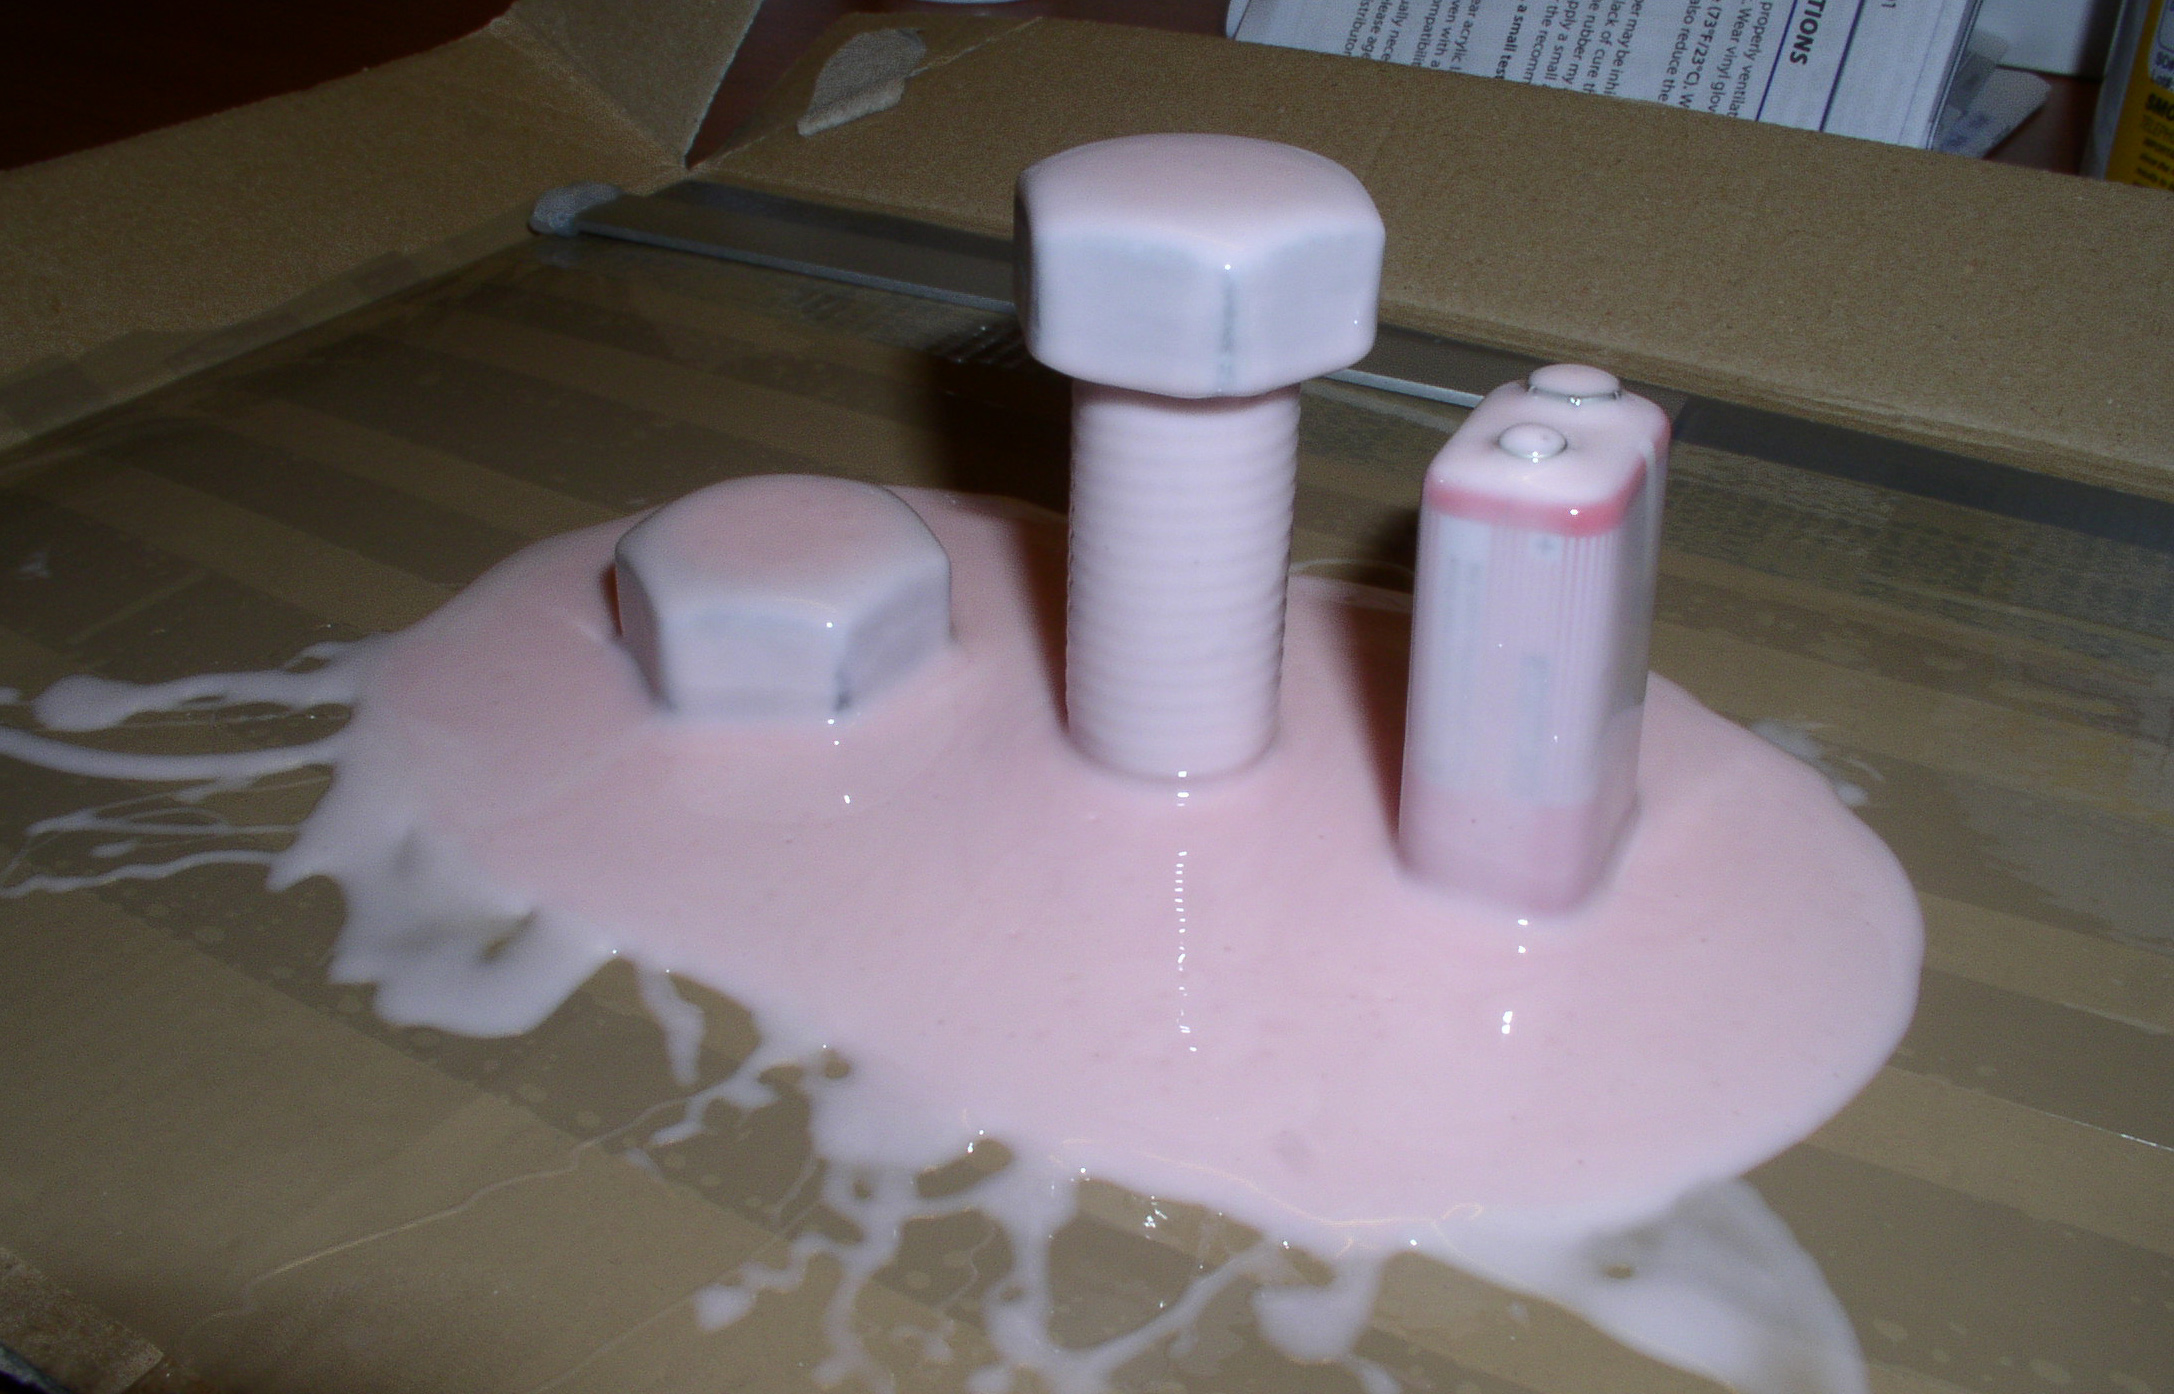
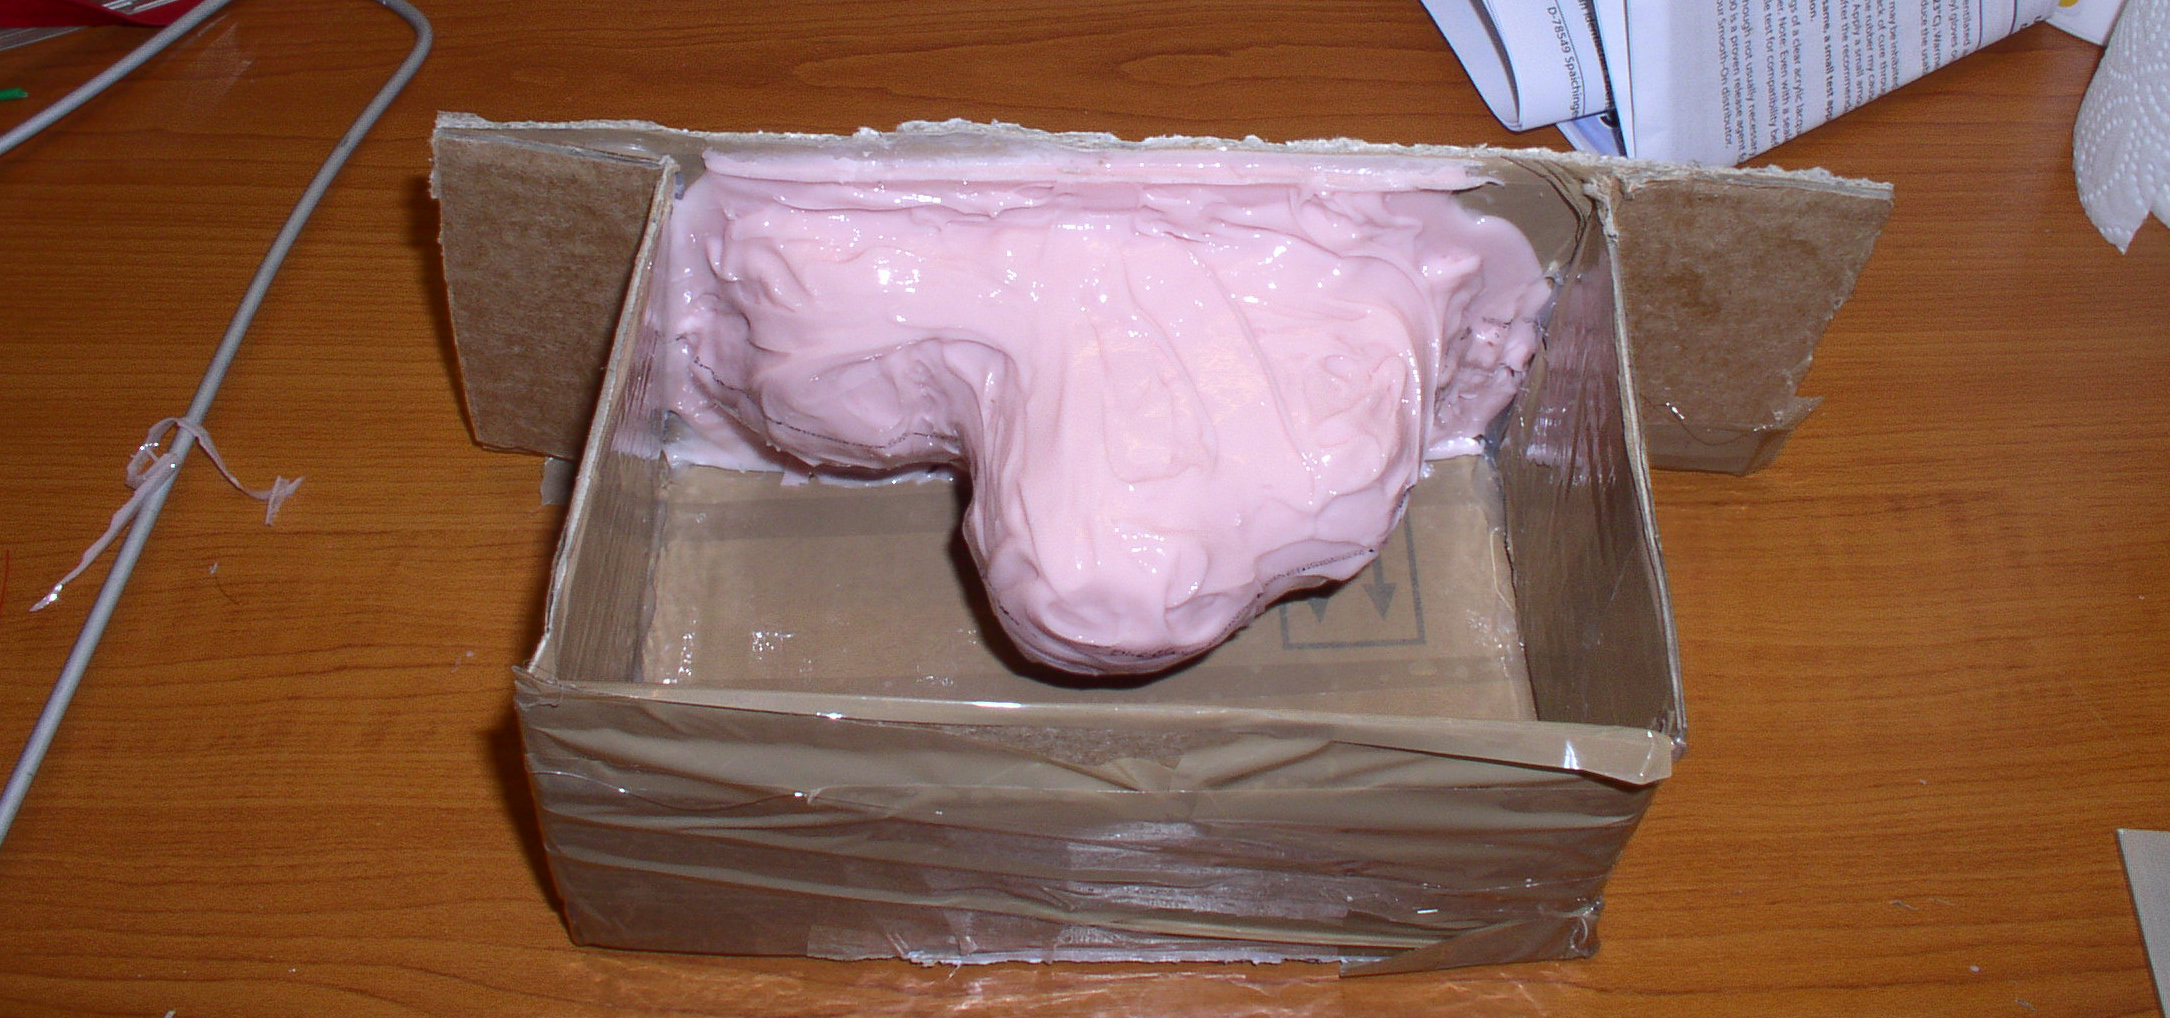
Food-grade silicon, first layer. The objects are held in place with a bit of hot-glue underneath, then the silicone is brushed onto them in several layers.
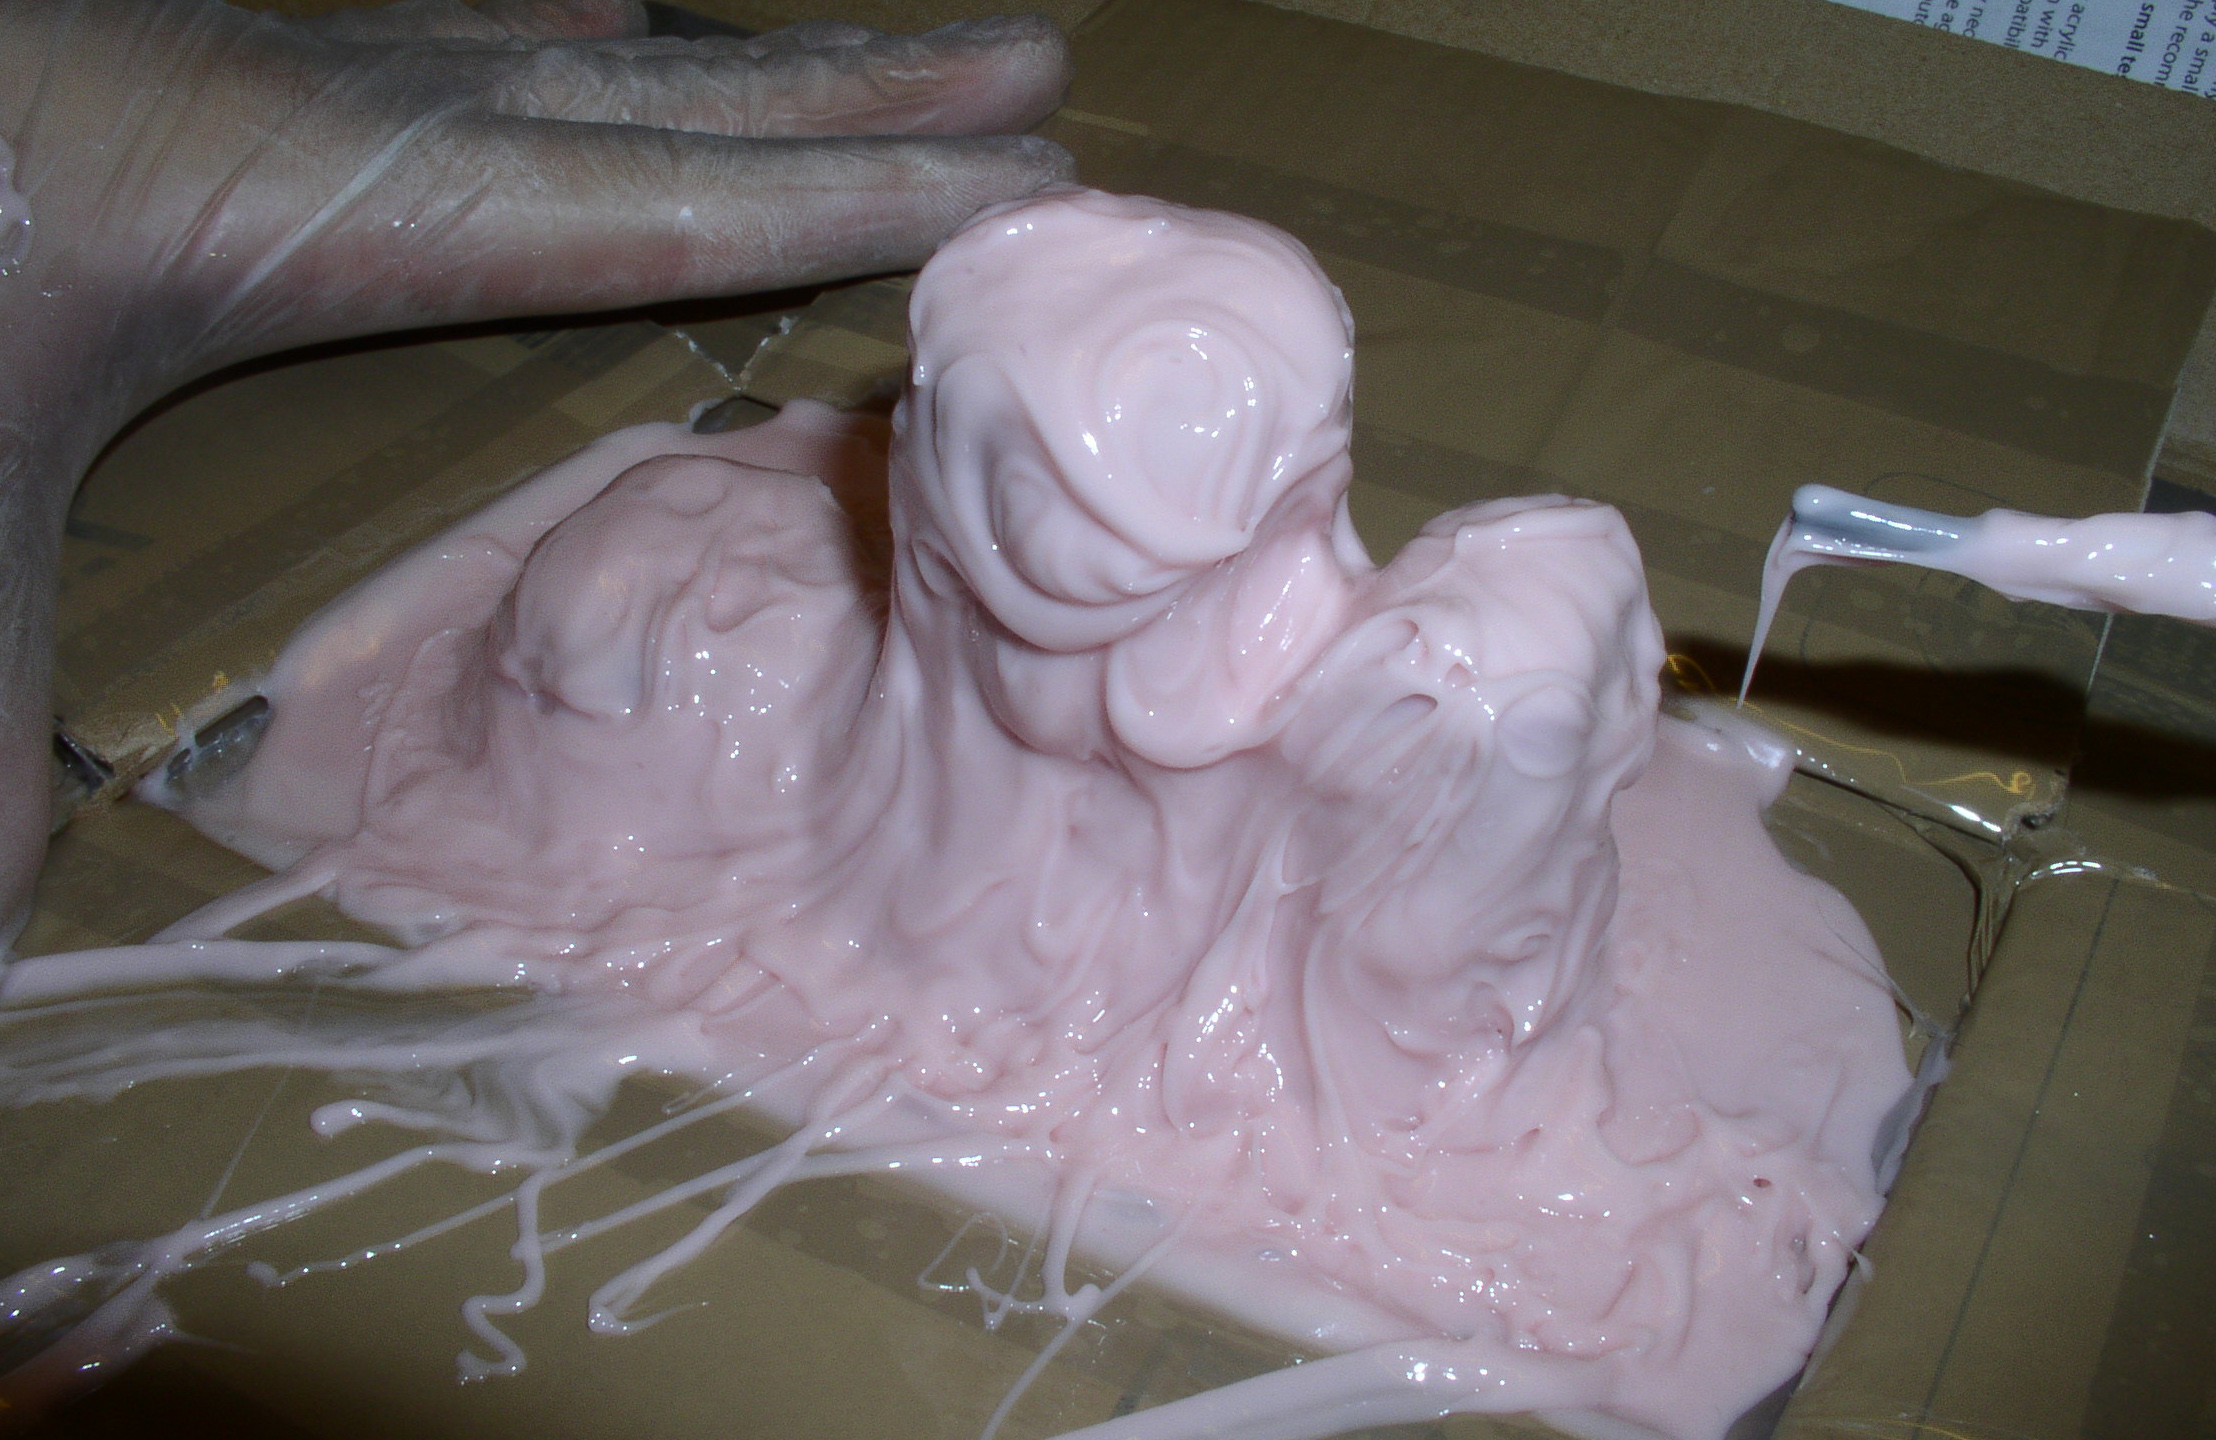
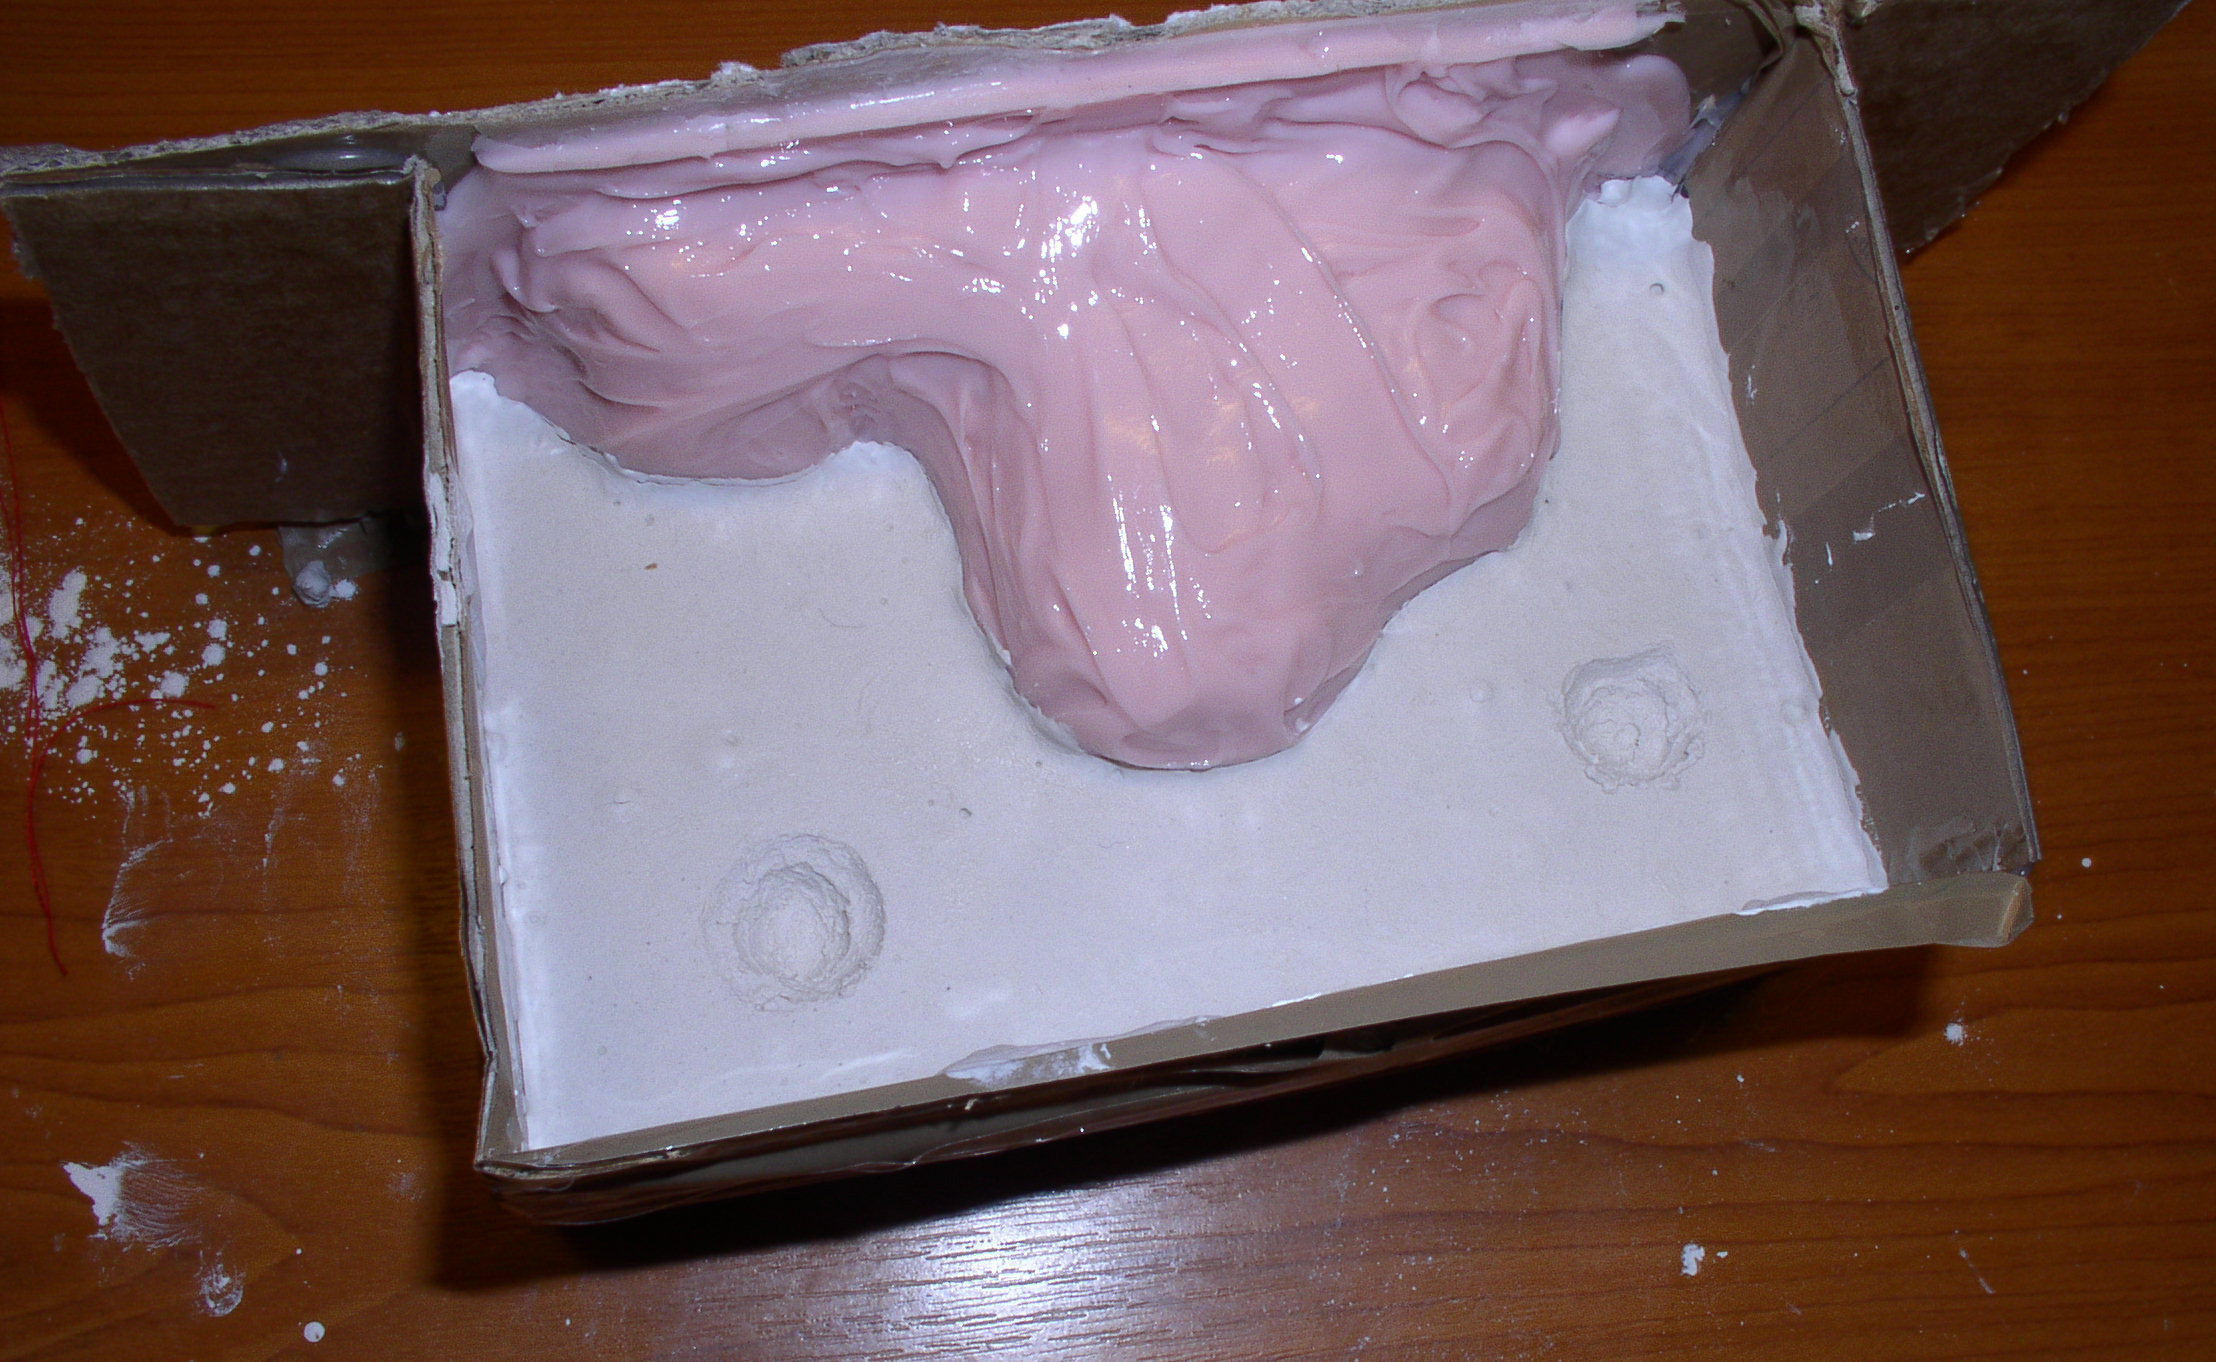
Nearly finished negative form. Looks quite ugly on the outside, but is sturdy enough to hold the form by itself. Nevertheless we'll create an encasement to be on the safe side.

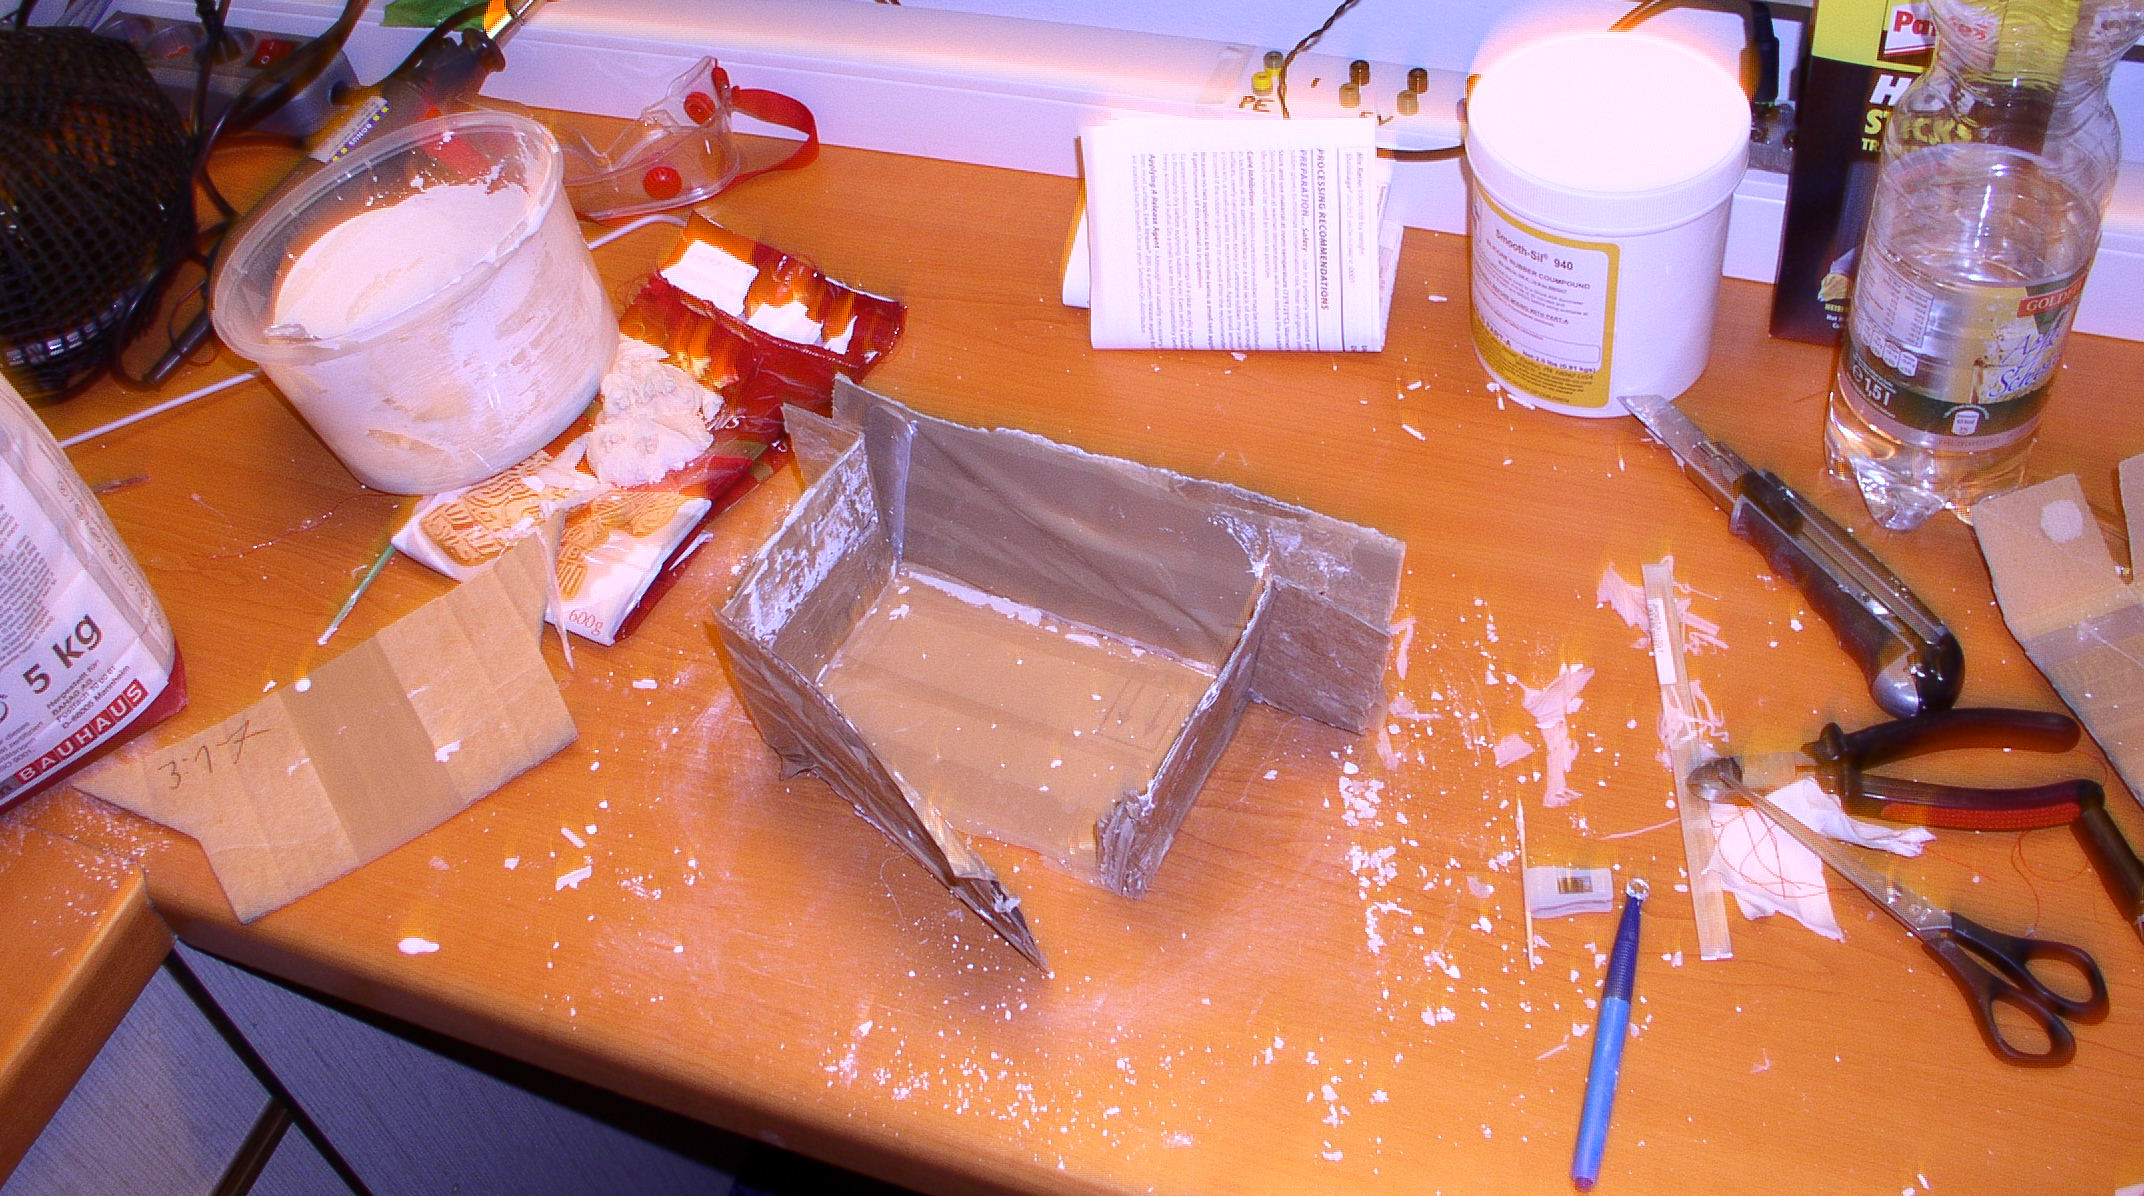
Magic: cardboard base rises and...
...creates a box, which can then be filled with plaster.
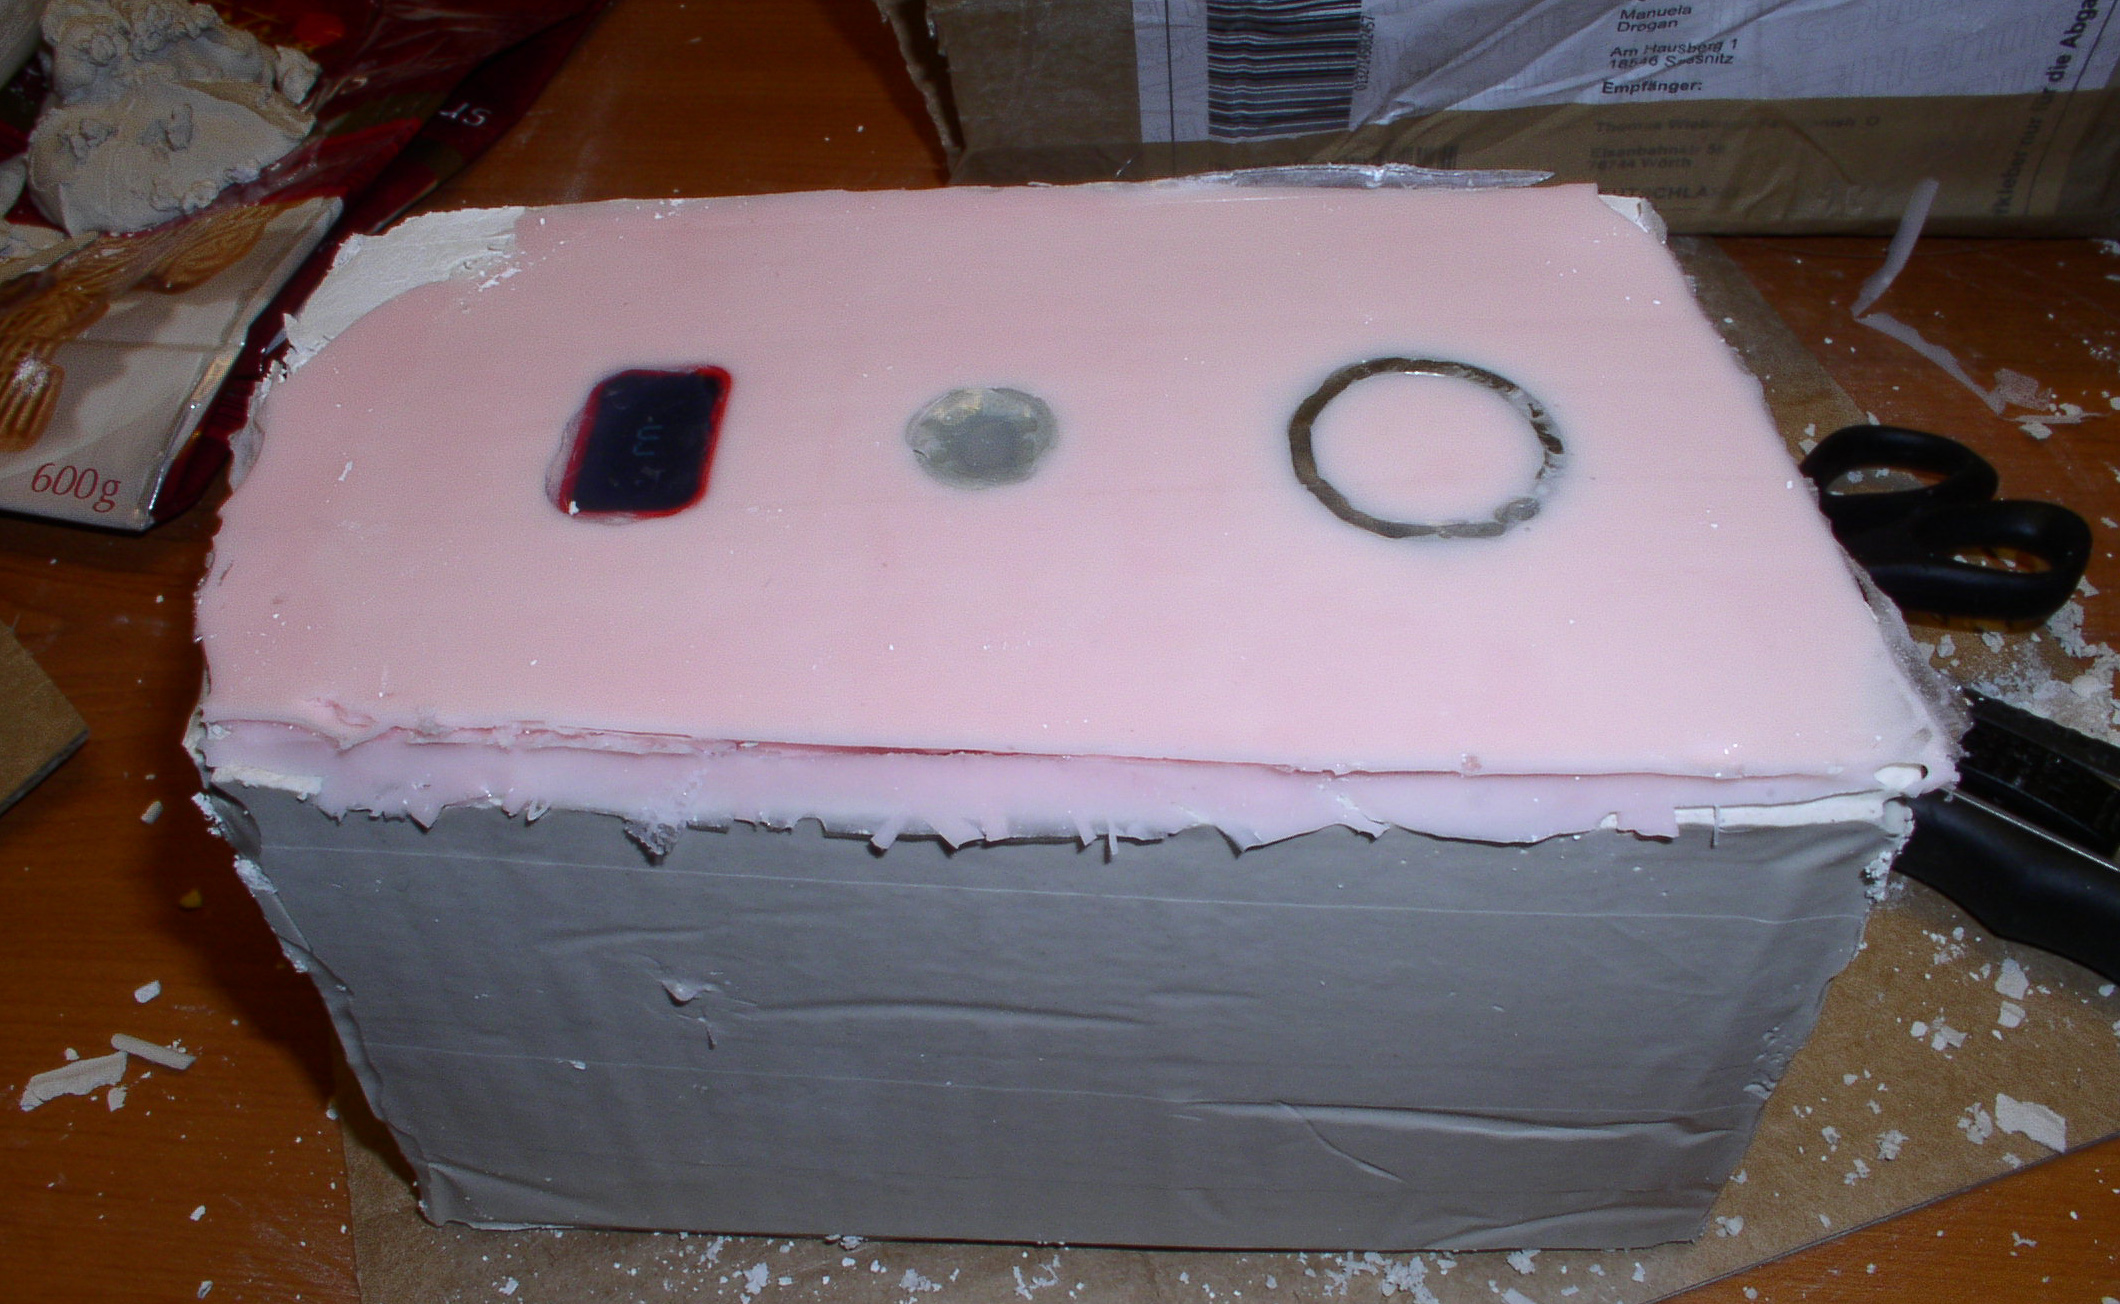
Our form is quite convex, so making the plaster encasement separable wasn't really necessary. Lower half, waiting to be hard. Afterwards, a mould release agent is applied and the upper half is poured in. The two circular dents are for exact positioning of the two halves.
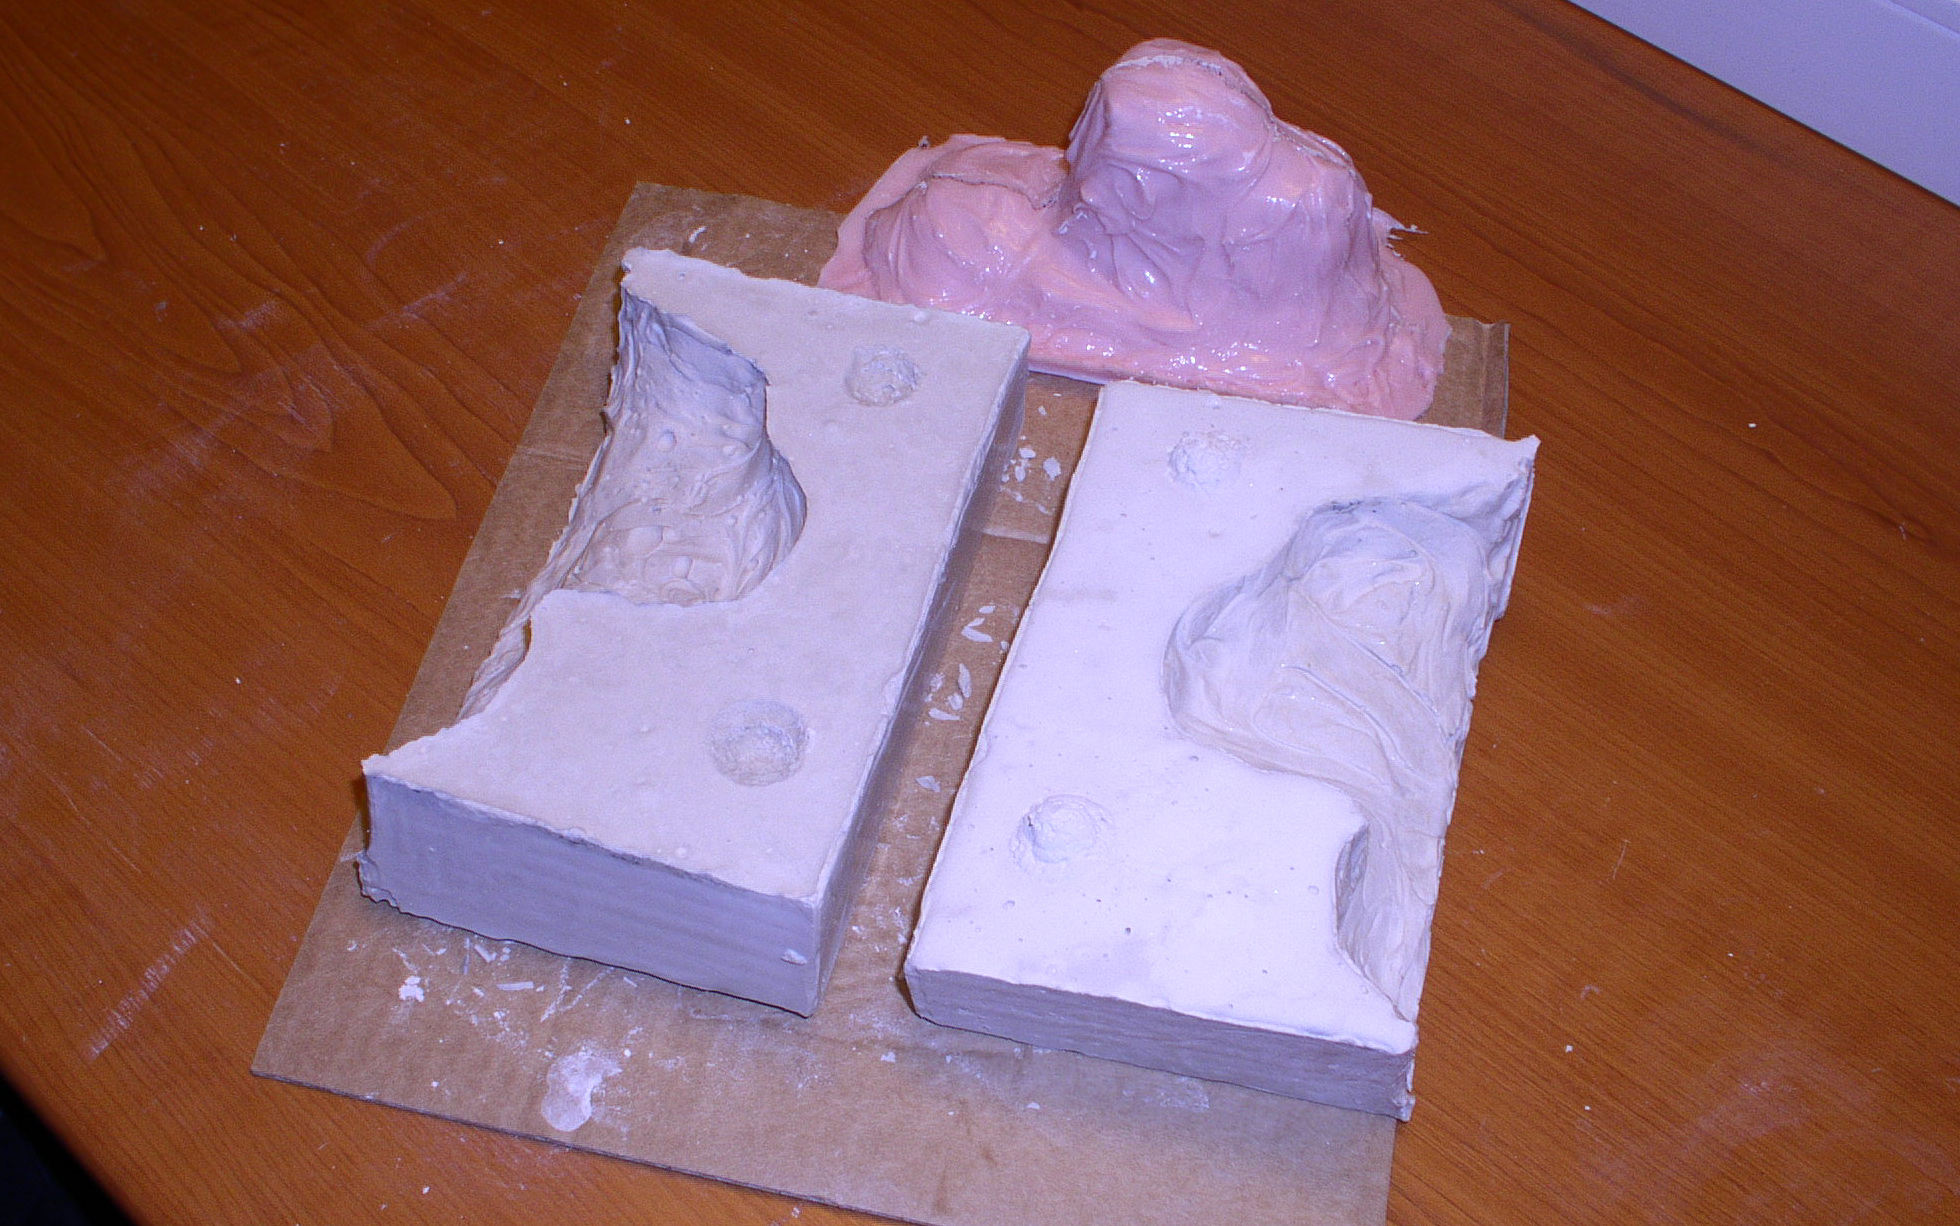
Finished form, waiting to be opened.
Looks clean and nice :)
We can't say the same for our work bench, though.
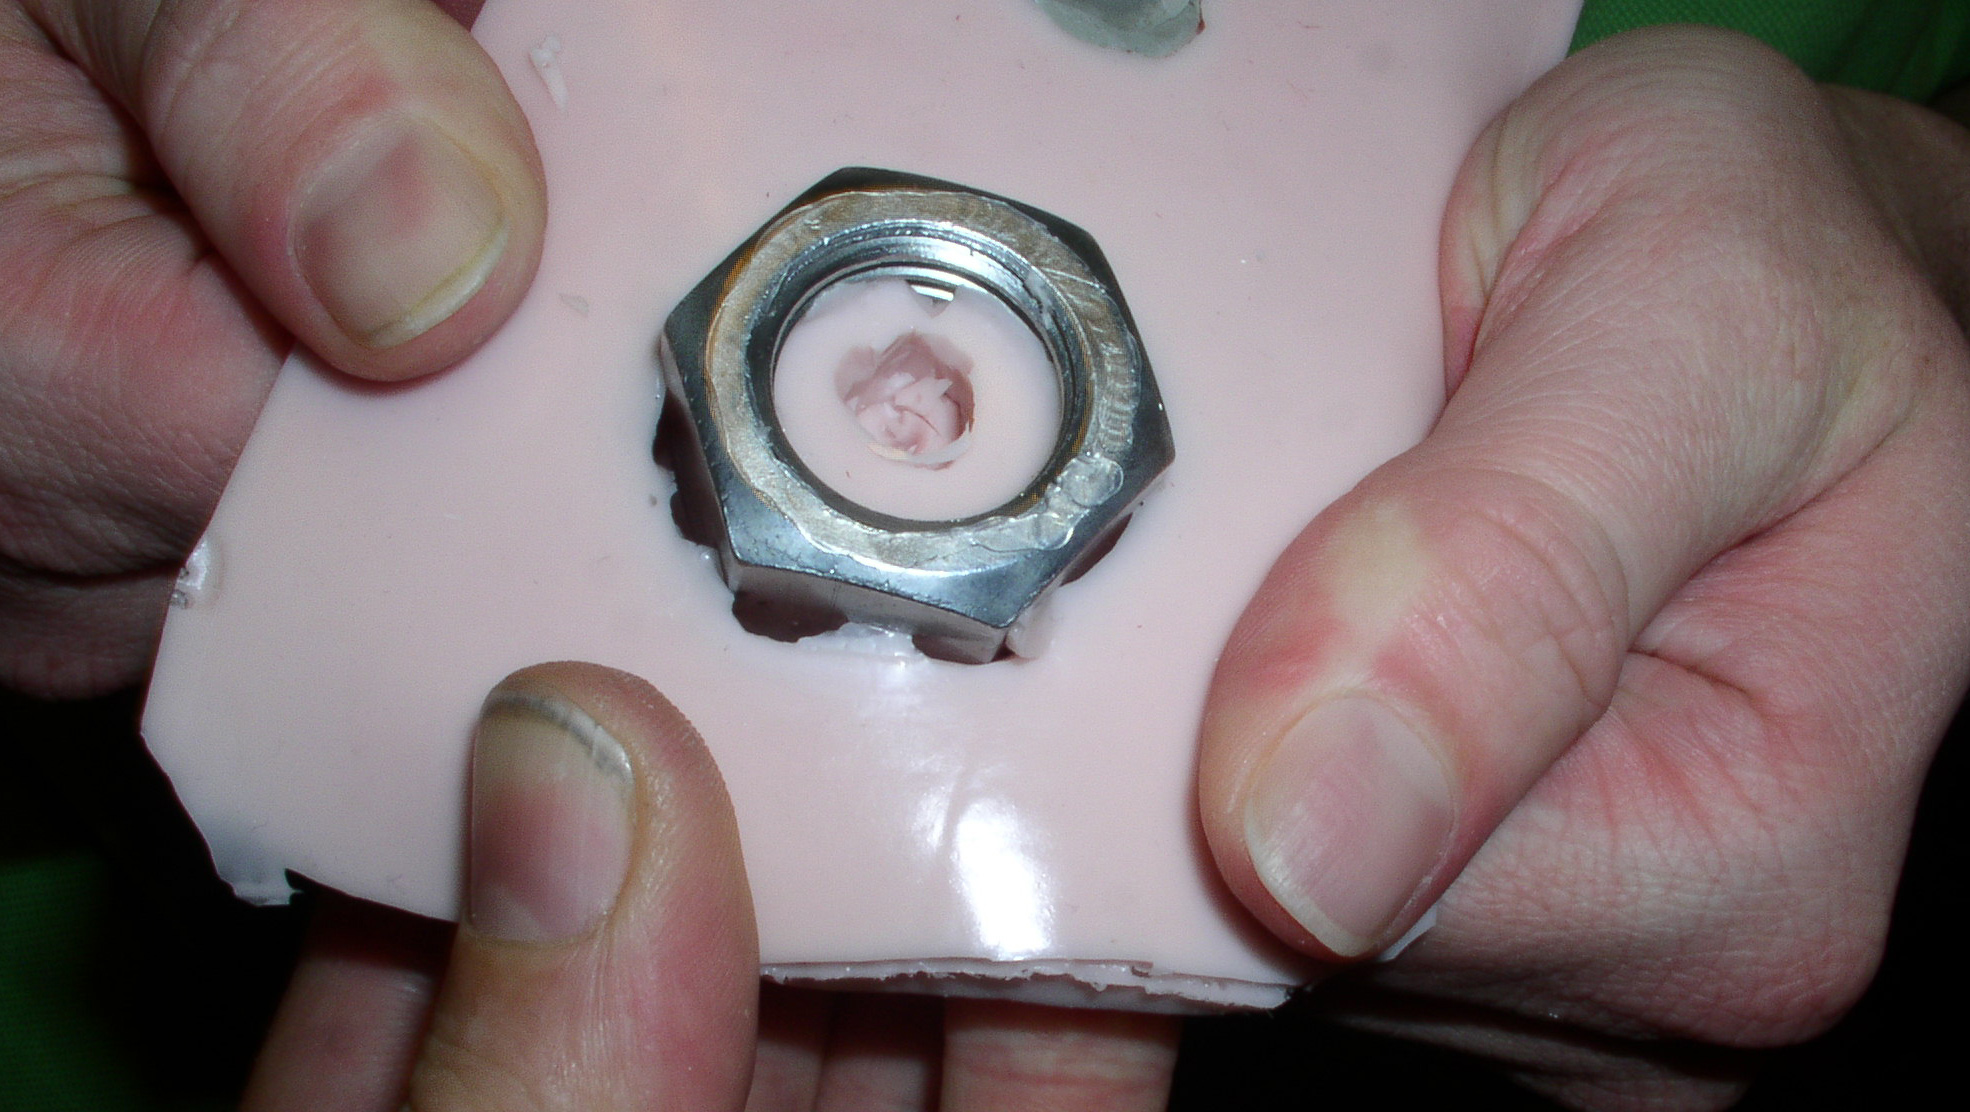
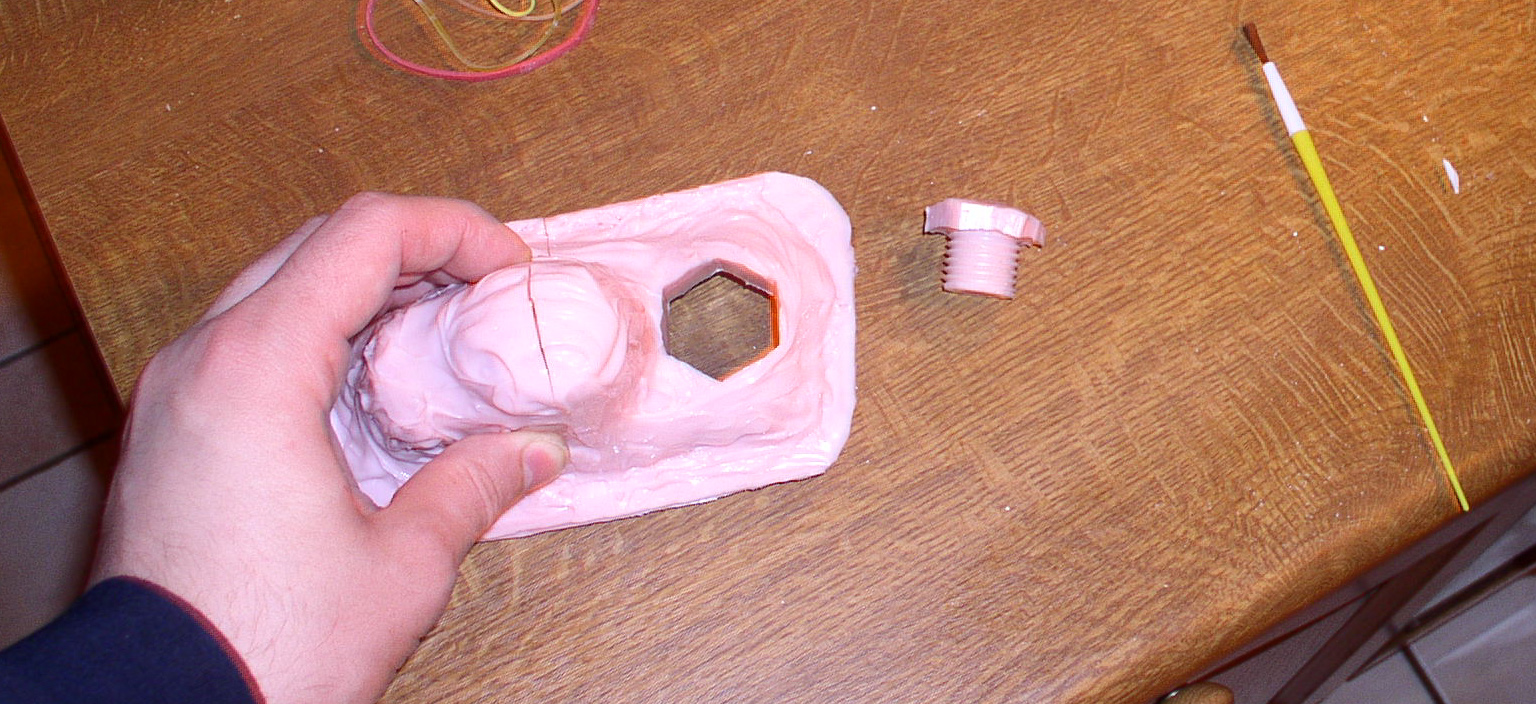
Removing the positives. This needed both some force and cutting open of the silicone.
The inner part of the nut was cut open to allow us to remove the chocolate nut by simply screwing it out.
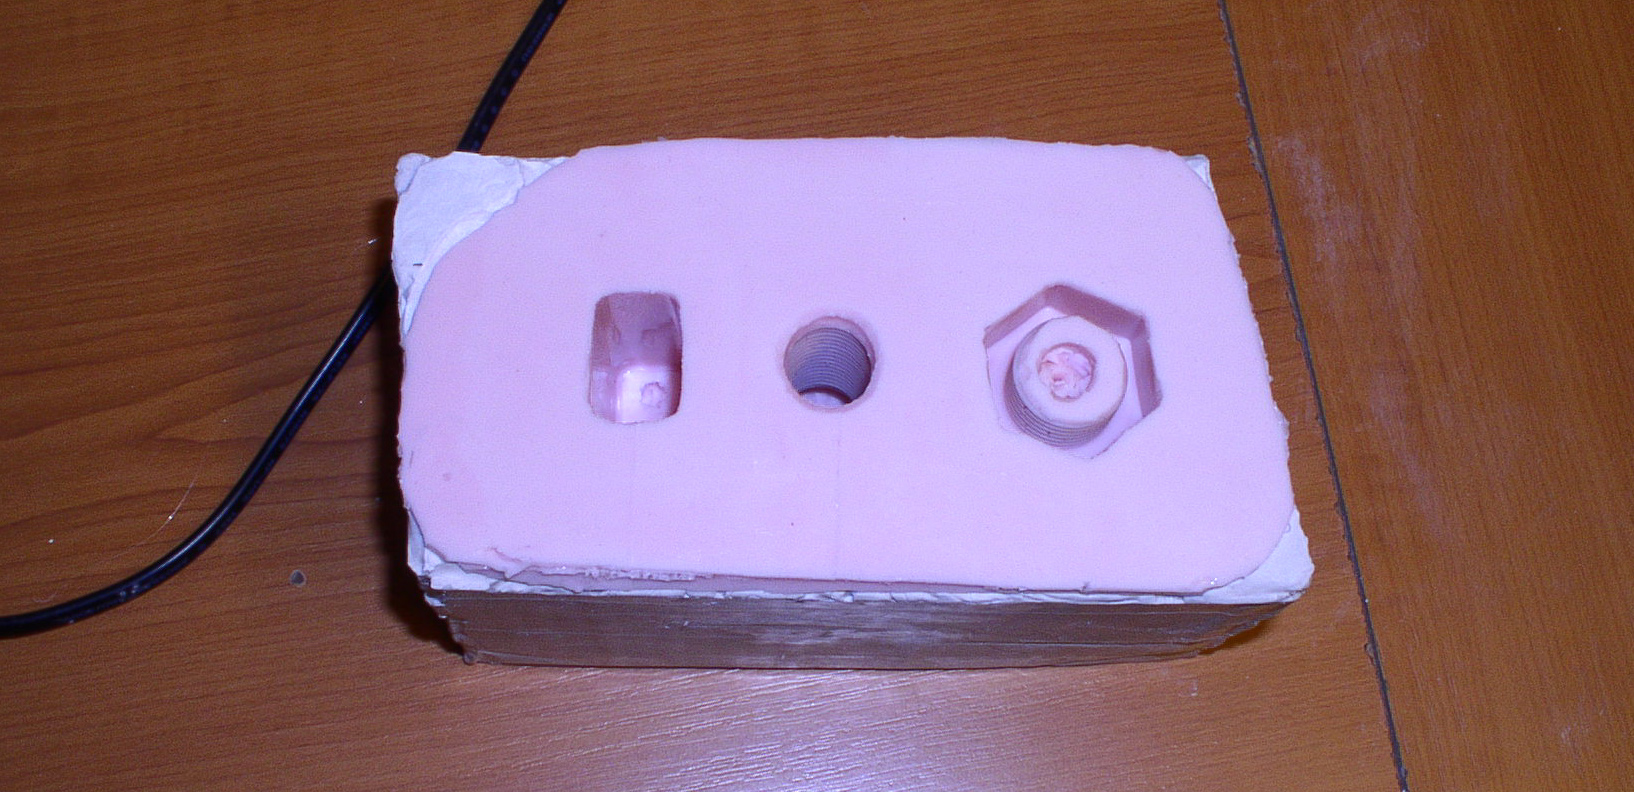
Finished negative form and encasement, ready to be filled with the chocolate.
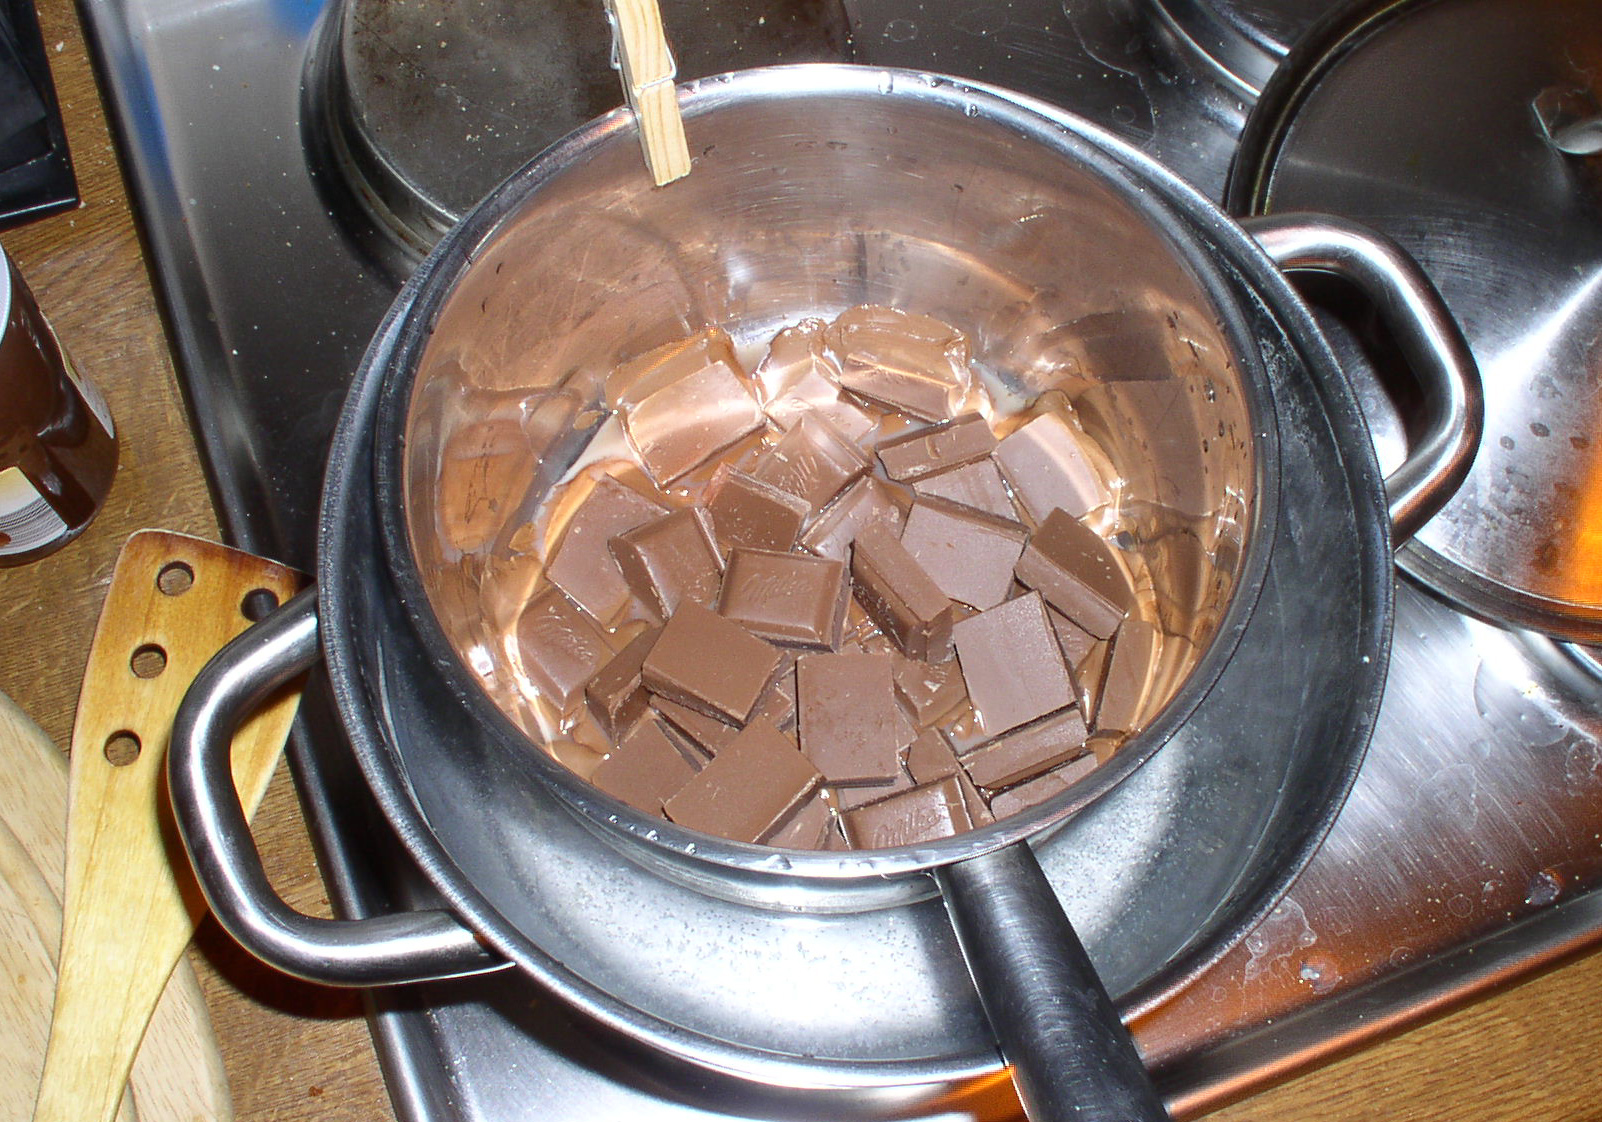
We never worked with molten chocolate before, so our first try was using normal chocolate bars. This didn't work too well, the melting point was too low so the finished product was barely handleable due to instant melting in our hands. The next tries used block chocolate as used in cake toppings, which worked much better, but still couldn't achieve the same non-melting-properties as commercially available block chocolate.
Chocolate was molten using a water bath to avoid burning it. I since learned this can be done much more sophisticated, using special 'chocolate thermometers' and a special procedure. We didn't know back then, though.

Pouring the molten, viscous chocolate into the form. We'd wished for an X-Ray here, as we couldn't see whether it actually filled the screw head properly.
Now ready to be placed in the fridge for cooling.
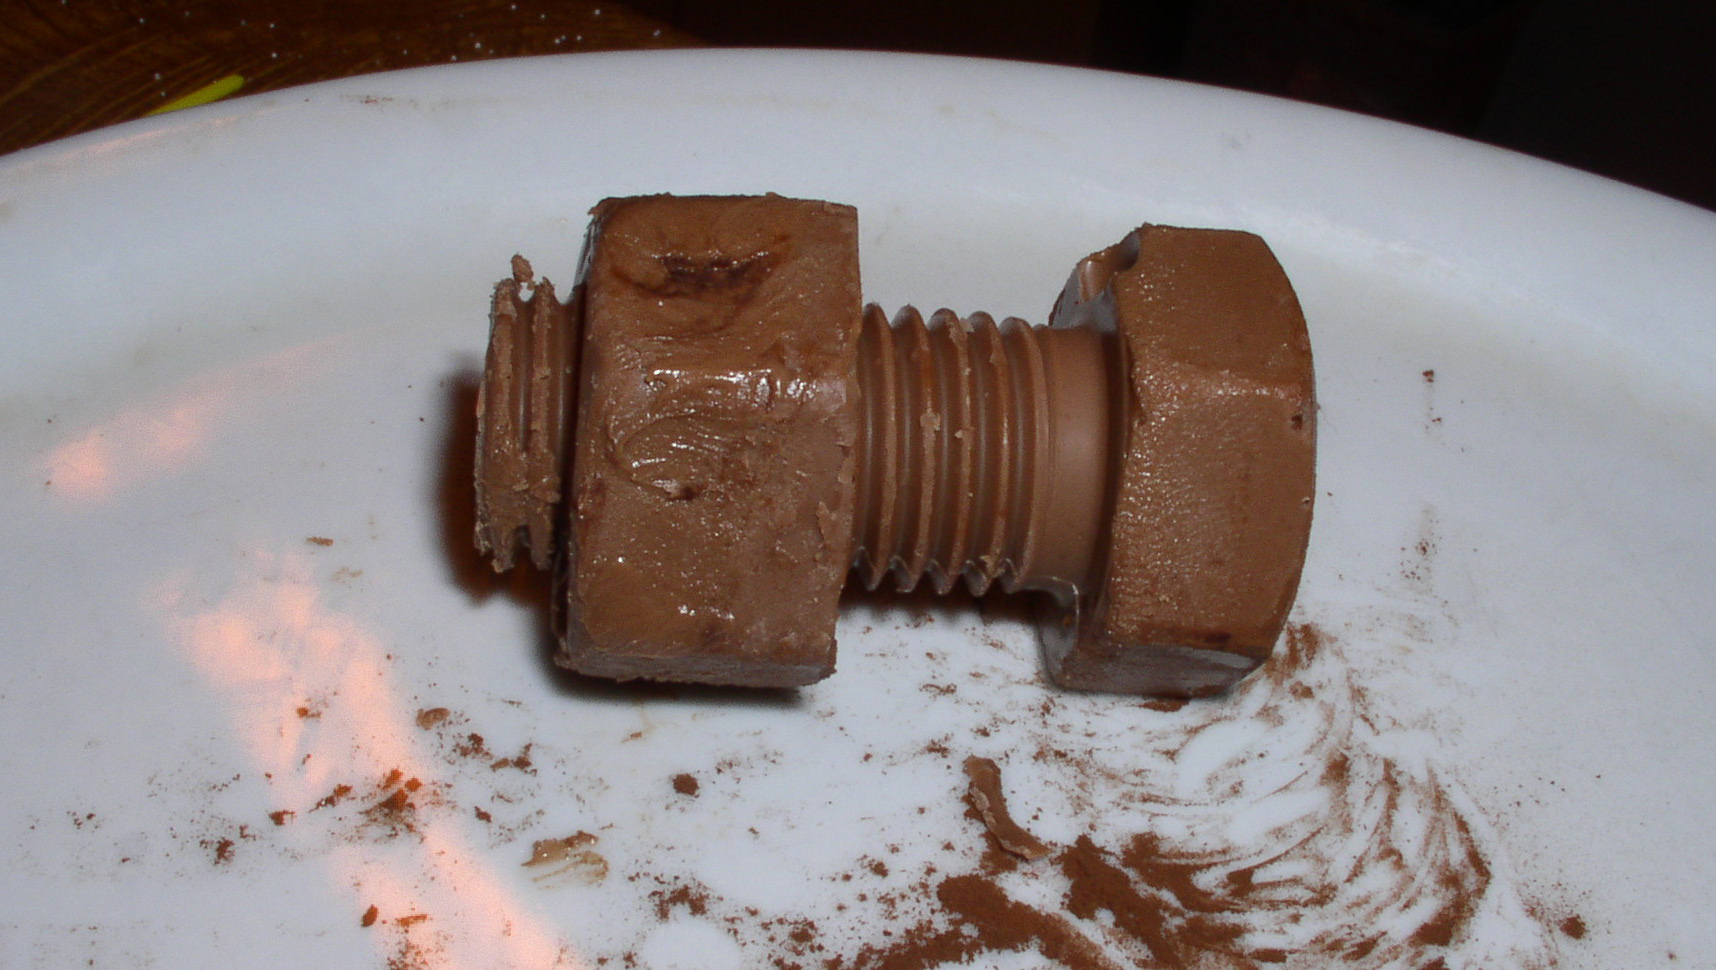
First try: quite successful. The nut actually can be turned onto the screw. Great feeling of achievement. The 9V battery didn't provide any power, though.
As mentioned, the first try melted way to quickly, we barely touched it and still left pawprints on them.
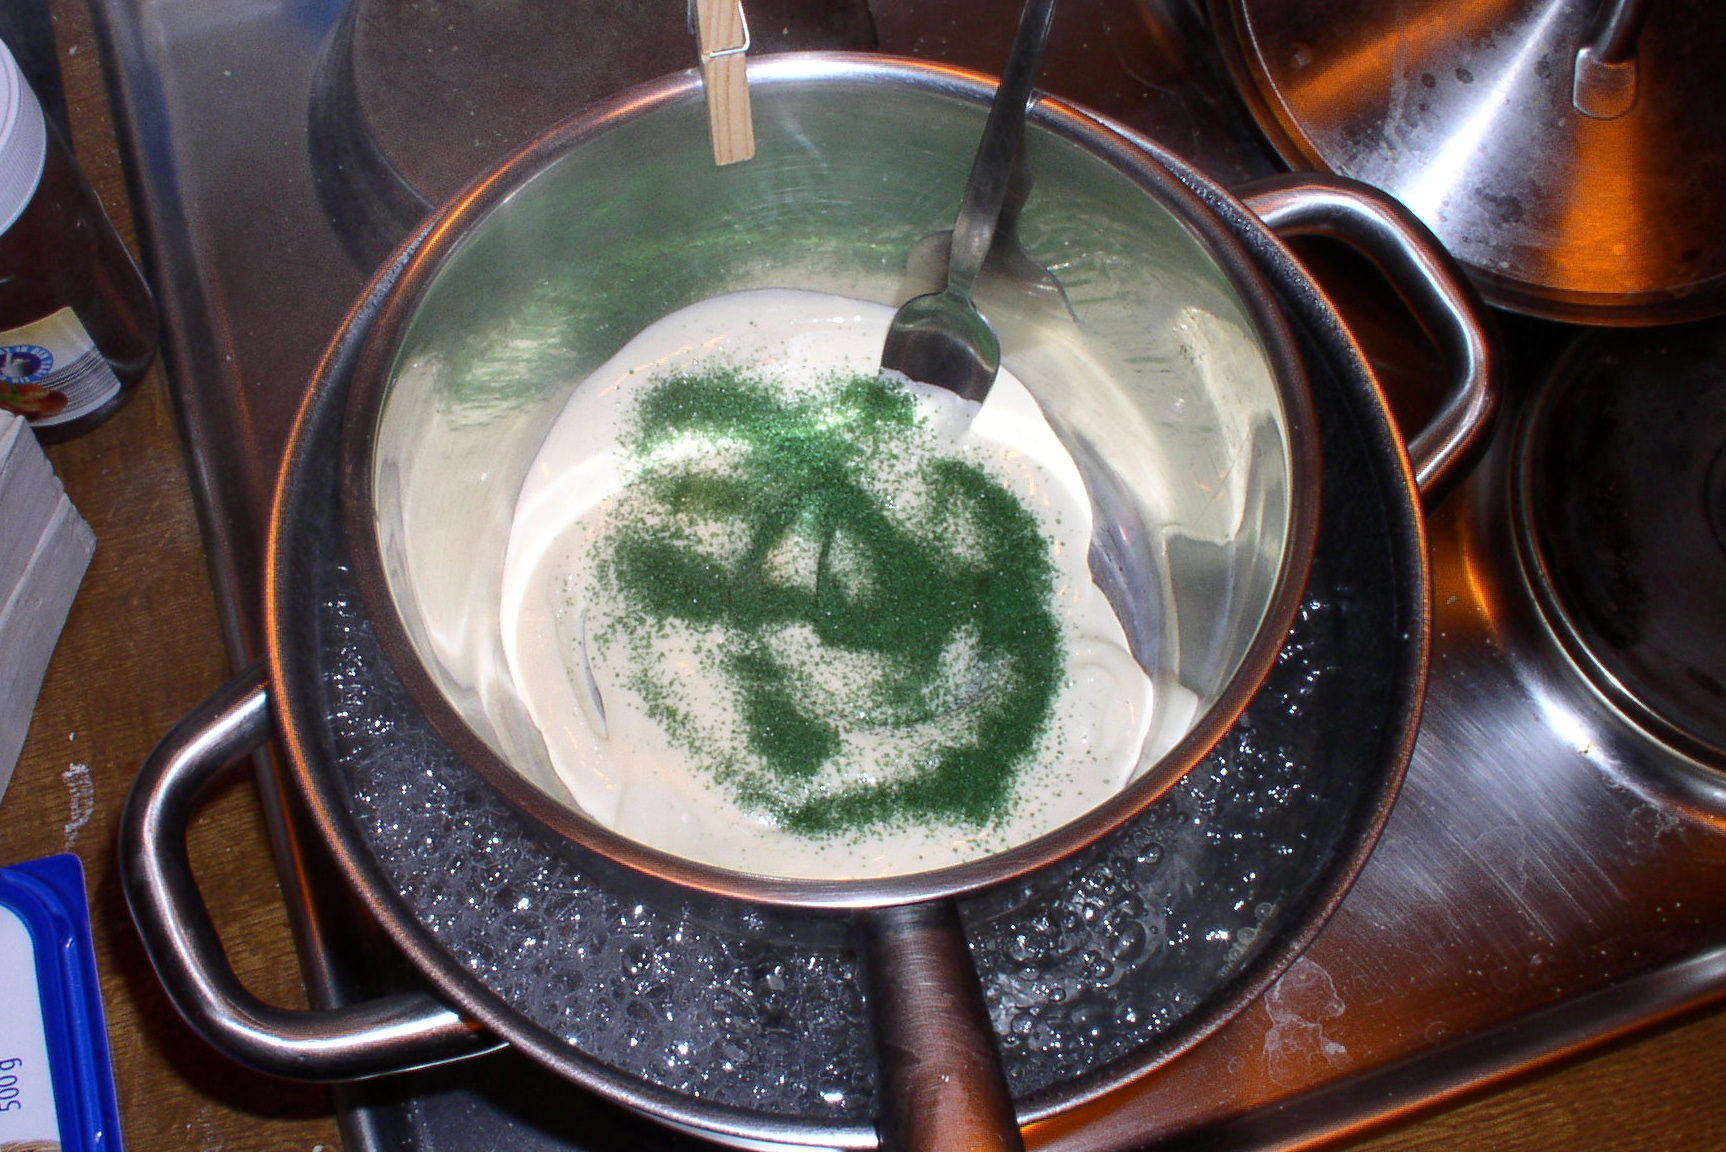
Curious, we also made one set with white chocolade, mixed with green food coloring. Turned out this was a powder, so it needed to be mixed into the chocolate.
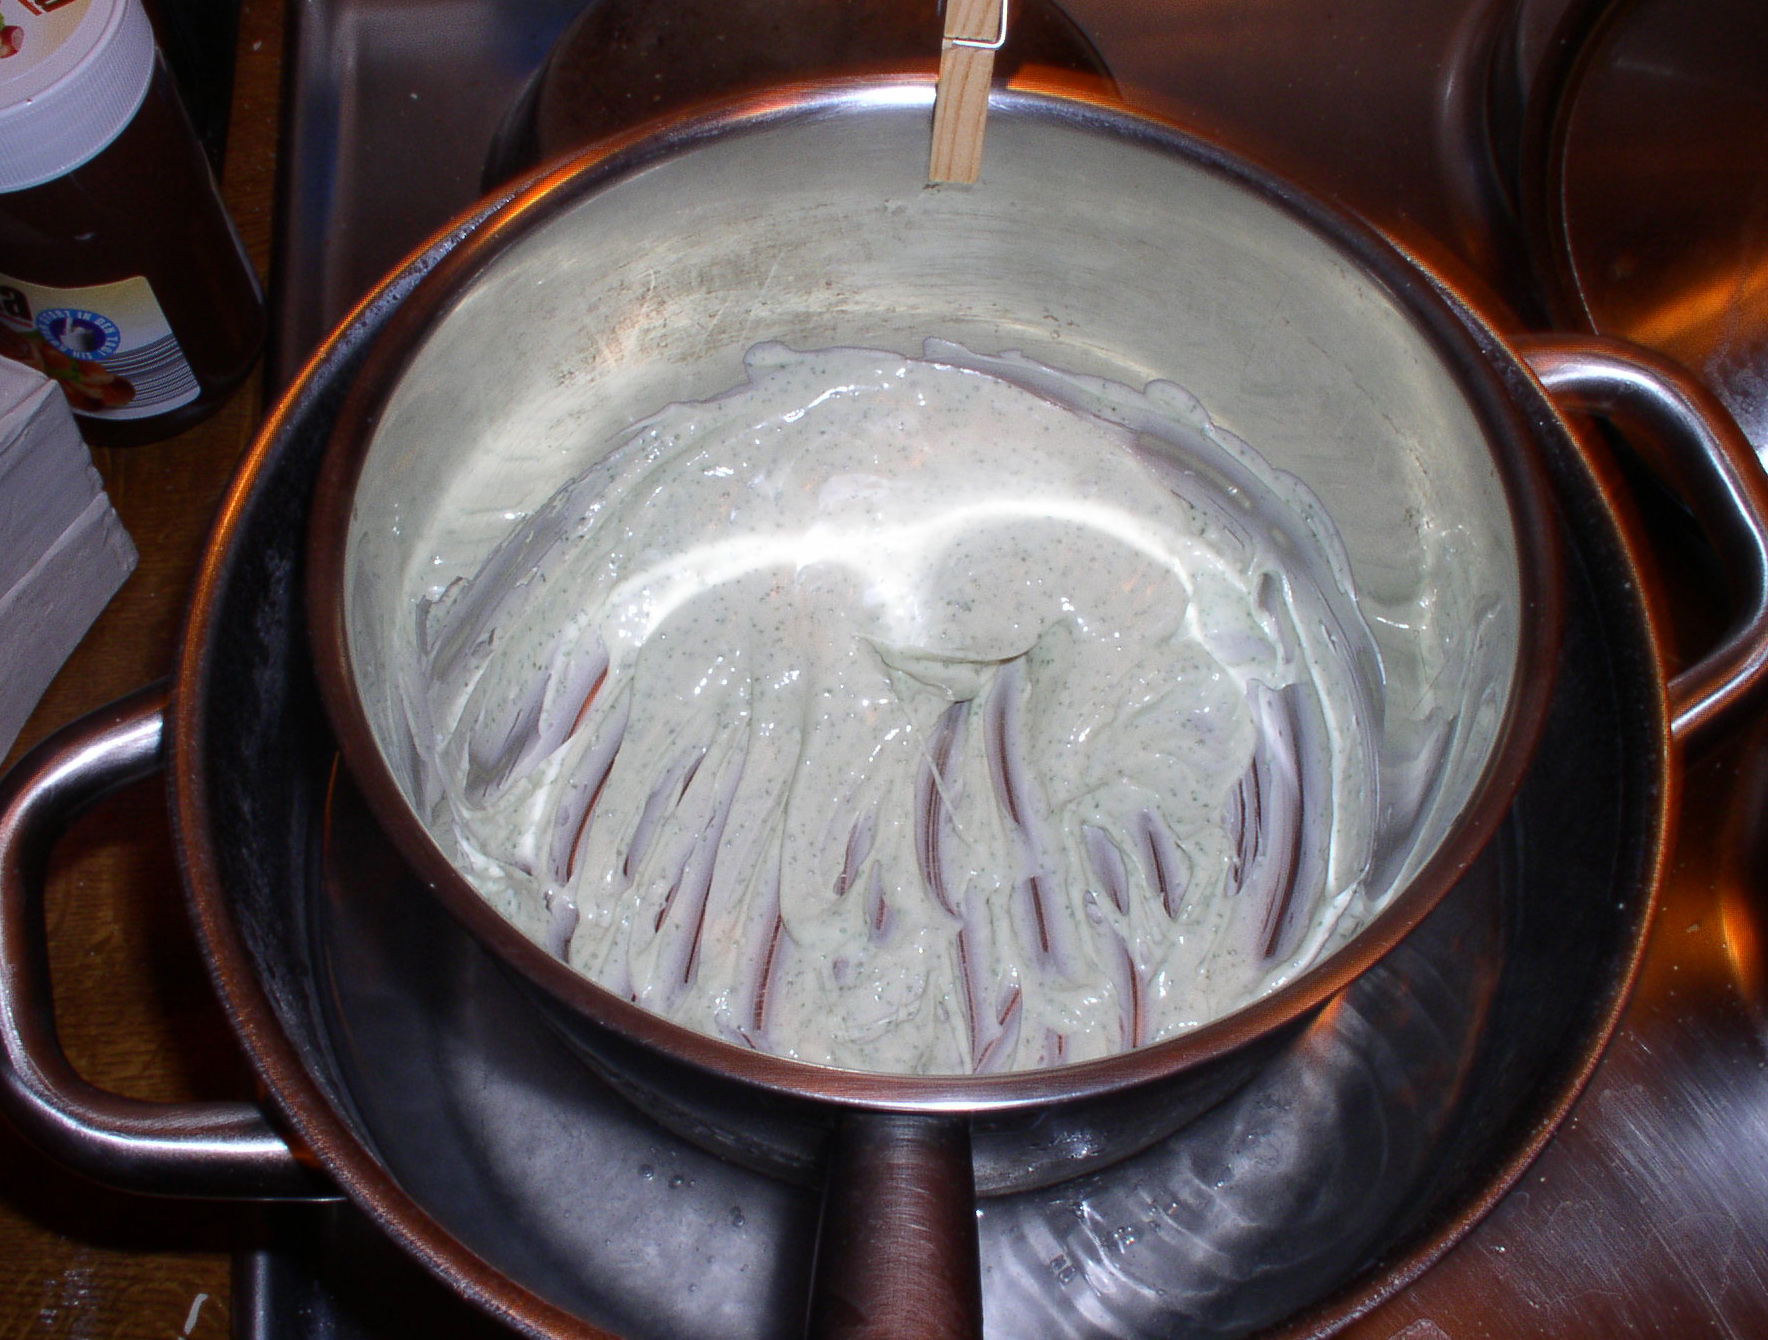
Turned out, the powder couldn't really resolve, but more looked like sprinkling the white with little green dots. Let's see how this turns out.
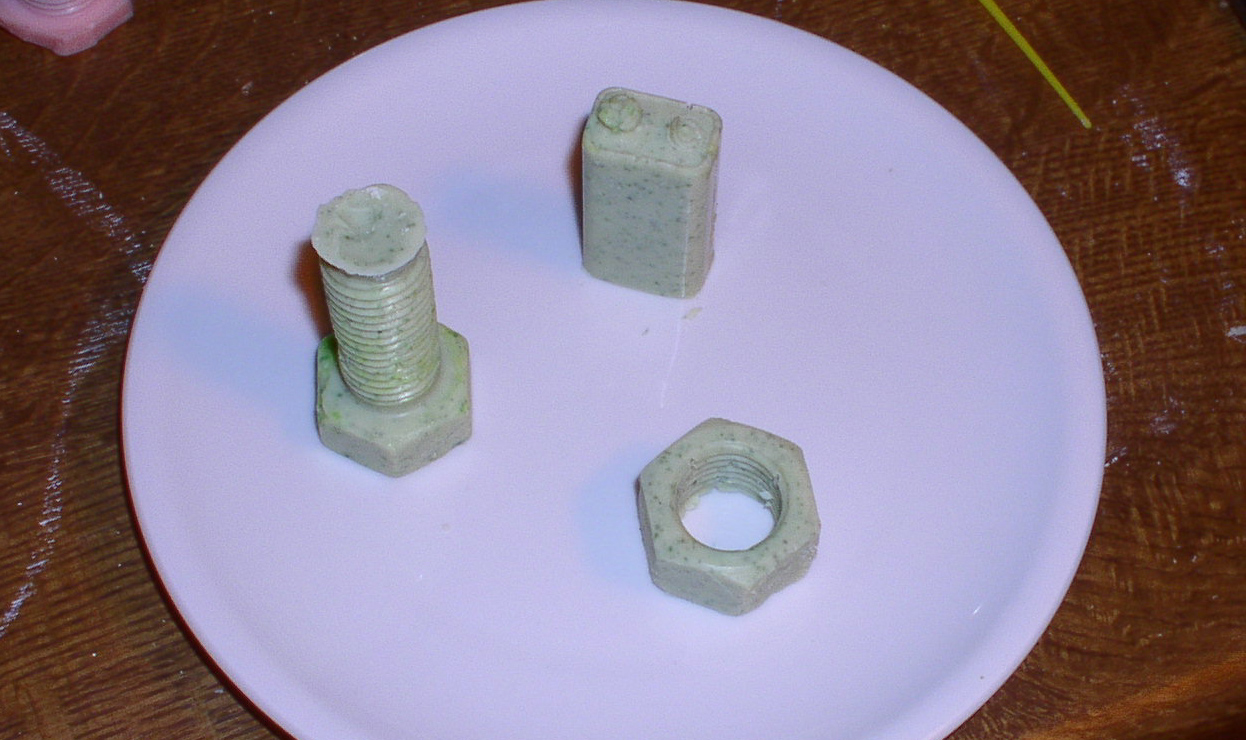
Not what we had in mind, but still a nice effect. Also, it was more handleable with the block chocolate - still melting easily, but we could touch them without instant-melting.

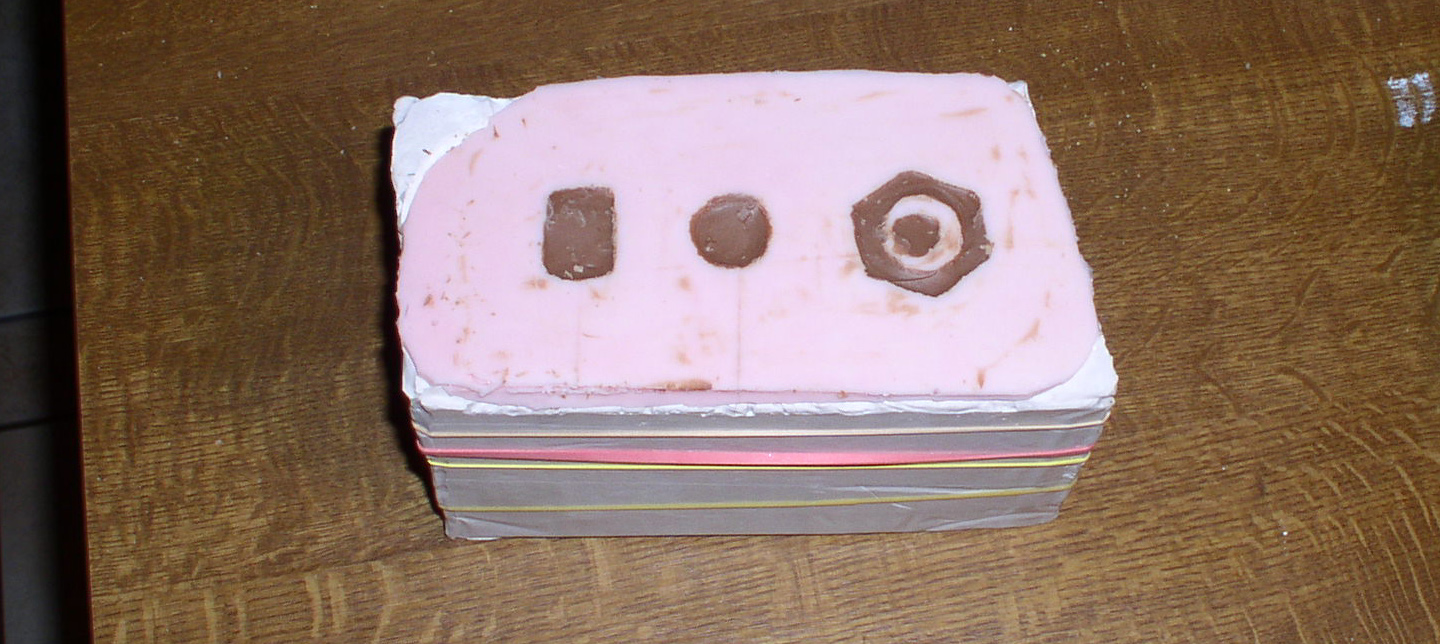
Now this looks exactly like what we had in mind: a box full of old, rusty stuff. We coated them with cocoa powder, giving them both a more rusted look and further increased the handling-before-melting time.
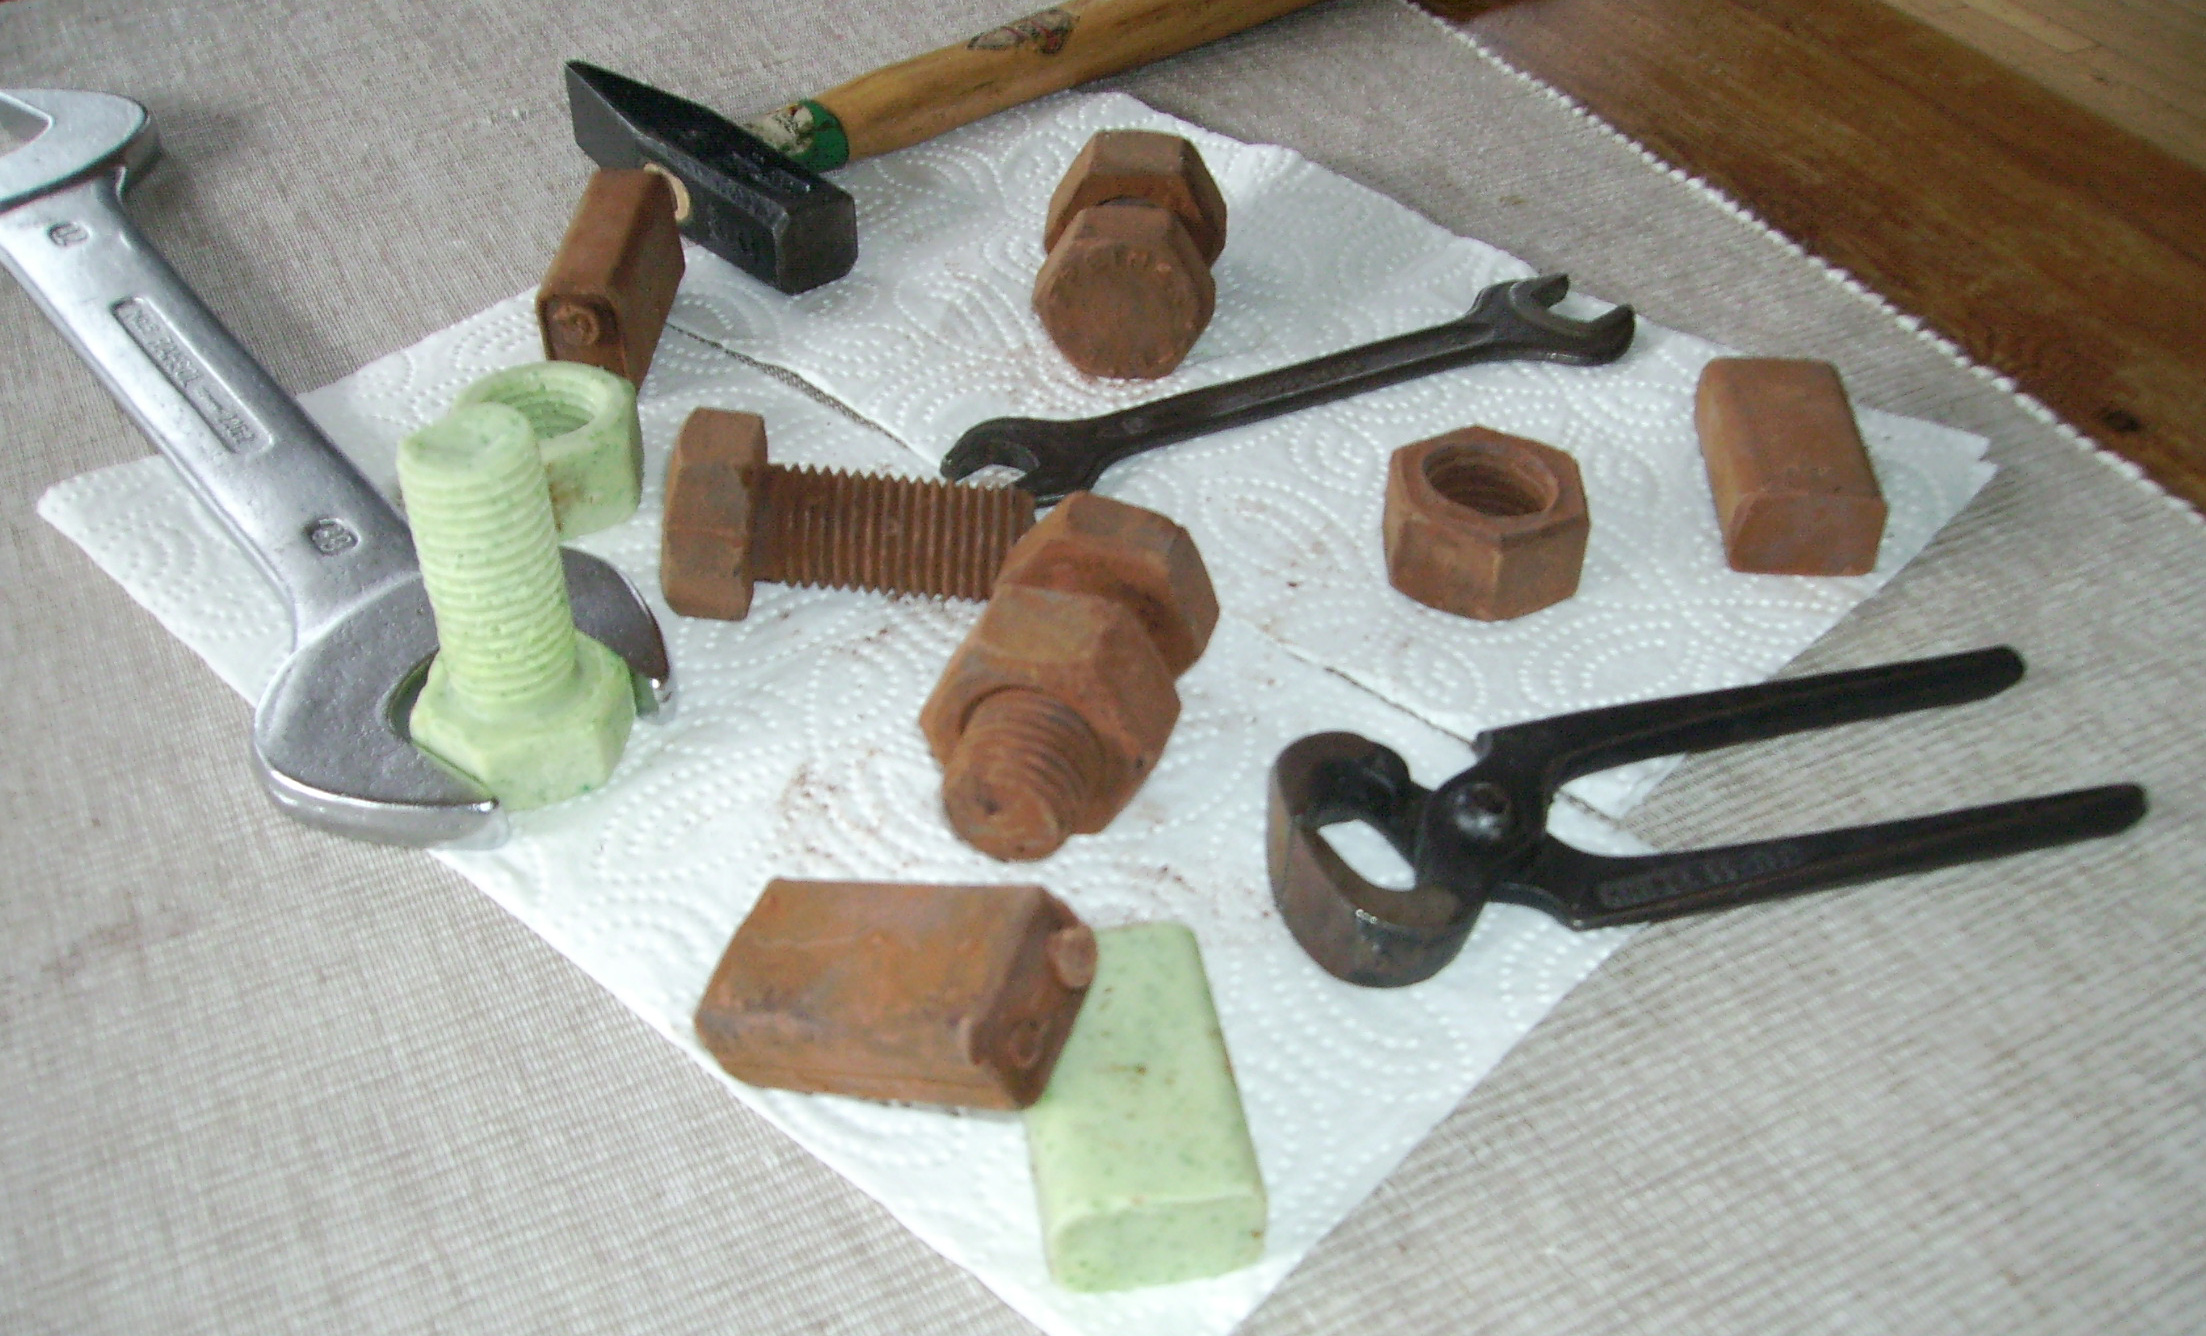
They fit neatly together.
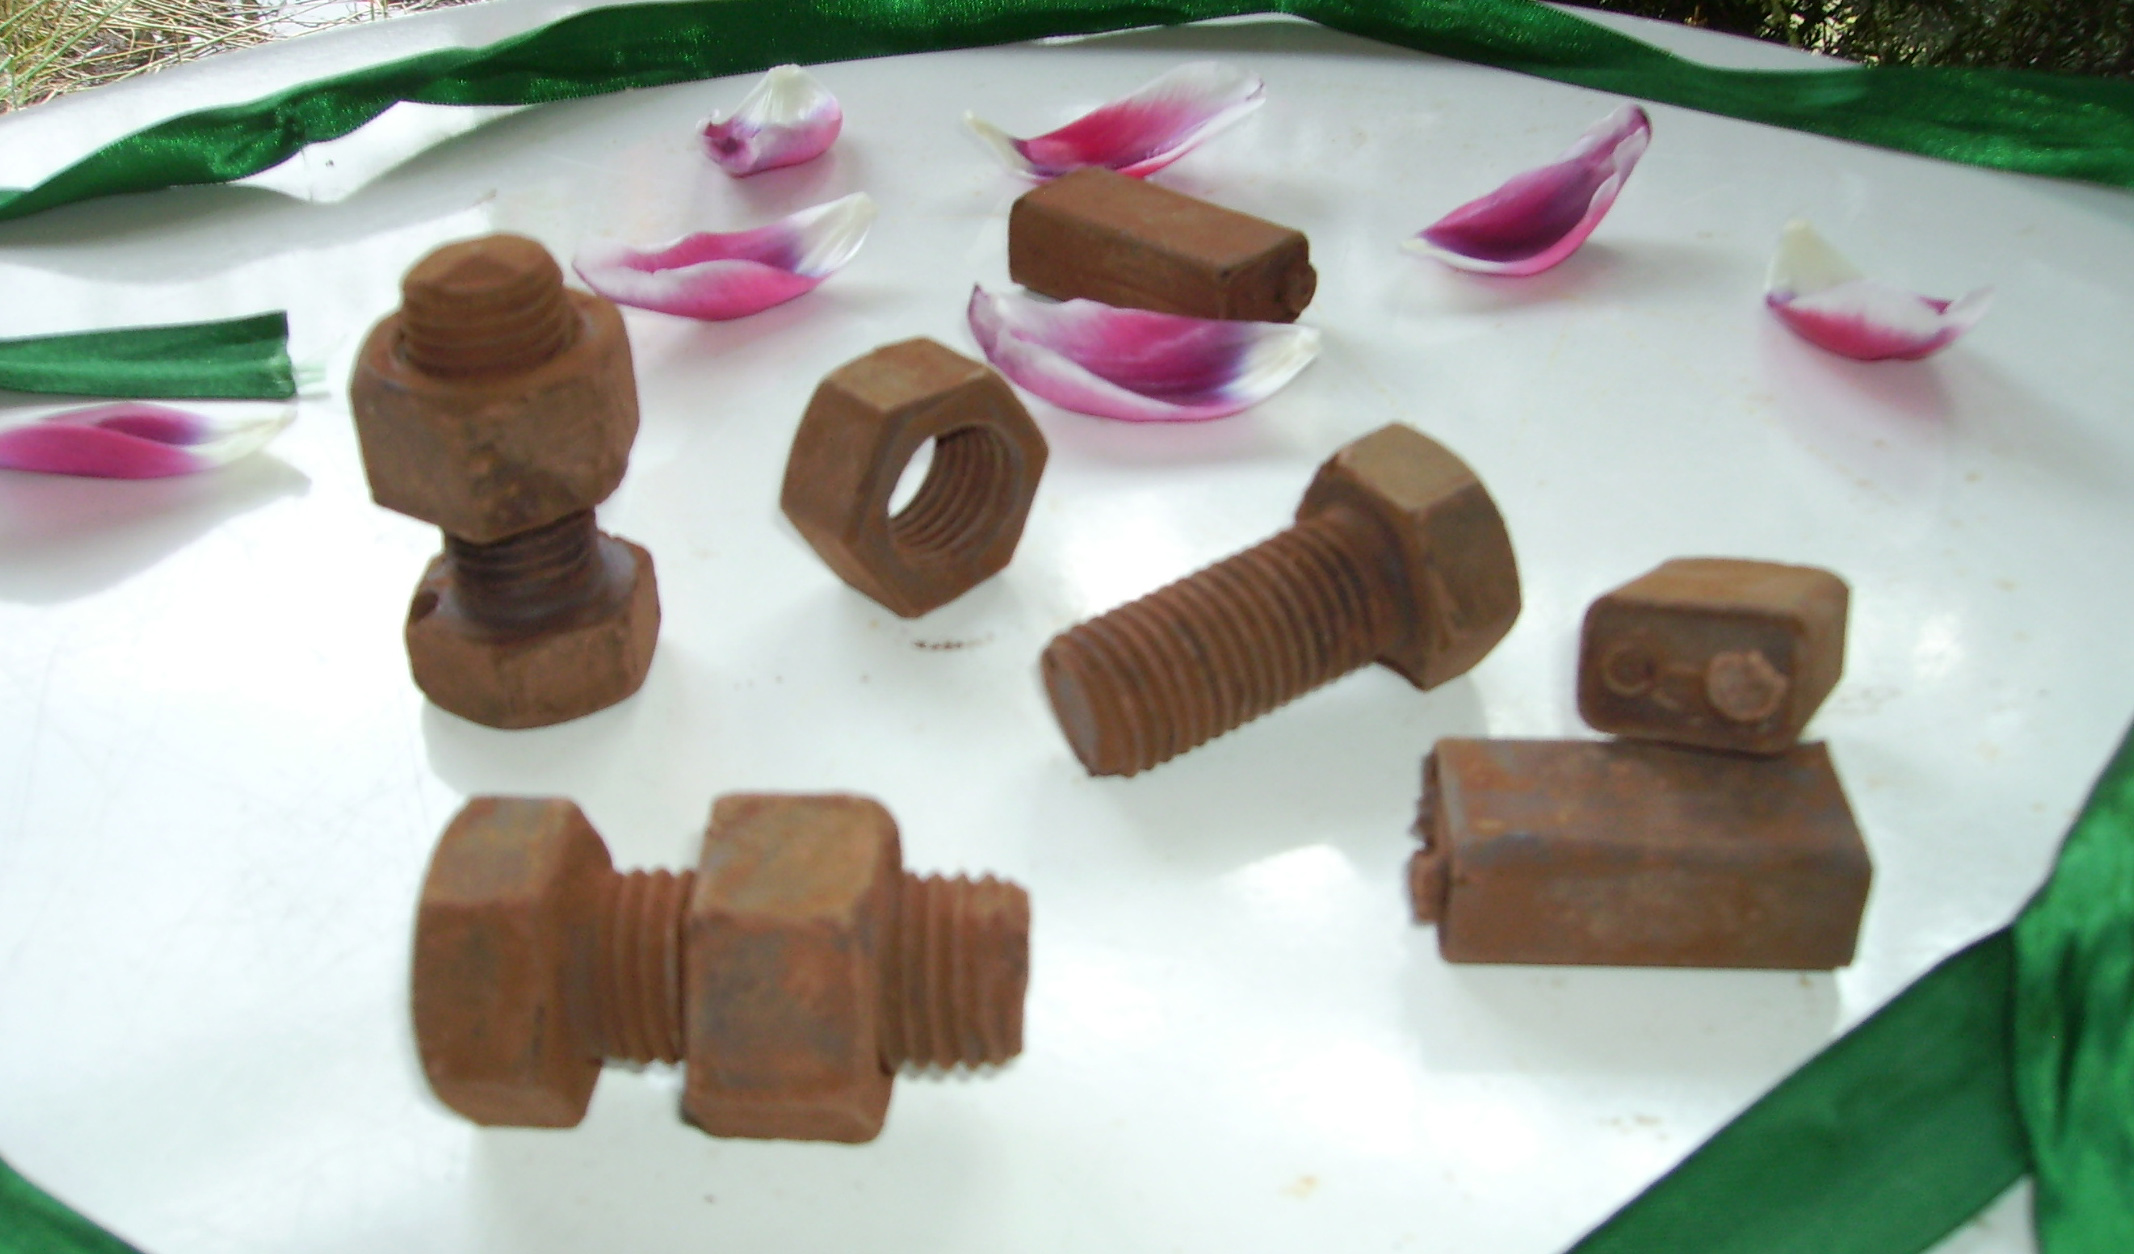
Our first - and to date only - batch were send to our parents, which nicely decorateed them. And hopefully ate them afterwards, too.
Our victim: a M20 screw (metric size). This will be replicated in chocolate, alongside with a fitting nut and a 9V block battery.
Preparing an encasement: cardboard + tape. Cheap, flexible, won't stick to anything and can be discarded afterwards.
Food-grade silicon, first layer. The objects are held in place with a bit of hot-glue underneath, then the silicone is brushed onto them in several layers.
Nearly finished negative form. Looks quite ugly on the outside, but is sturdy enough to hold the form by itself. Nevertheless we'll create an encasement to be on the safe side.
Magic: cardboard base rises and...
...creates a box, which can then be filled with plaster.
Our form is quite convex, so making the plaster encasement separable wasn't really necessary. Lower half, waiting to be hard. Afterwards, a mould release agent is applied and the upper half is poured in. The two circular dents are for exact positioning of the two halves.
Finished form, waiting to be opened.
Looks clean and nice :)
We can't say the same for our work bench, though.
Removing the positives. This needed both some force and cutting open of the silicone.
The inner part of the nut was cut open to allow us to remove the chocolate nut by simply screwing it out.
Finished negative form and encasement, ready to be filled with the chocolate.
We never worked with molten chocolate before, so our first try was using normal chocolate bars. This didn't work too well, the melting point was too low so the finished product was barely handleable due to instant melting in our hands. The next tries used block chocolate as used in cake toppings, which worked much better, but still couldn't achieve the same non-melting-properties as commercially available block chocolate.
Chocolate was molten using a water bath to avoid burning it. I since learned this can be done much more sophisticated, using special 'chocolate thermometers' and a special procedure. We didn't know back then, though.
Pouring the molten, viscous chocolate into the form. We'd wished for an X-Ray here, as we couldn't see whether it actually filled the screw head properly.
Now ready to be placed in the fridge for cooling.
First try: quite successful. The nut actually can be turned onto the screw. Great feeling of achievement. The 9V battery didn't provide any power, though.
As mentioned, the first try melted way to quickly, we barely touched it and still left pawprints on them.
Curious, we also made one set with white chocolade, mixed with green food coloring. Turned out this was a powder, so it needed to be mixed into the chocolate.
Turned out, the powder couldn't really resolve, but more looked like sprinkling the white with little green dots. Let's see how this turns out.
Not what we had in mind, but still a nice effect. Also, it was more handleable with the block chocolate - still melting easily, but we could touch them without instant-melting.
Now this looks exactly like what we had in mind: a box full of old, rusty stuff. We coated them with cocoa powder, giving them both a more rusted look and further increased the handling-before-melting time.
They fit neatly together.
Our first - and to date only - batch were send to our parents, which nicely decorateed them. And hopefully ate them afterwards, too.